
In this article we will see how to use the SES.
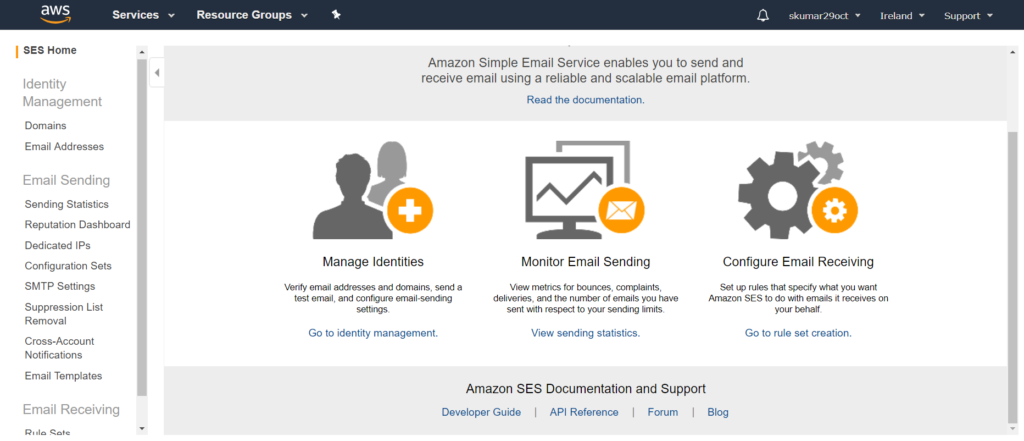
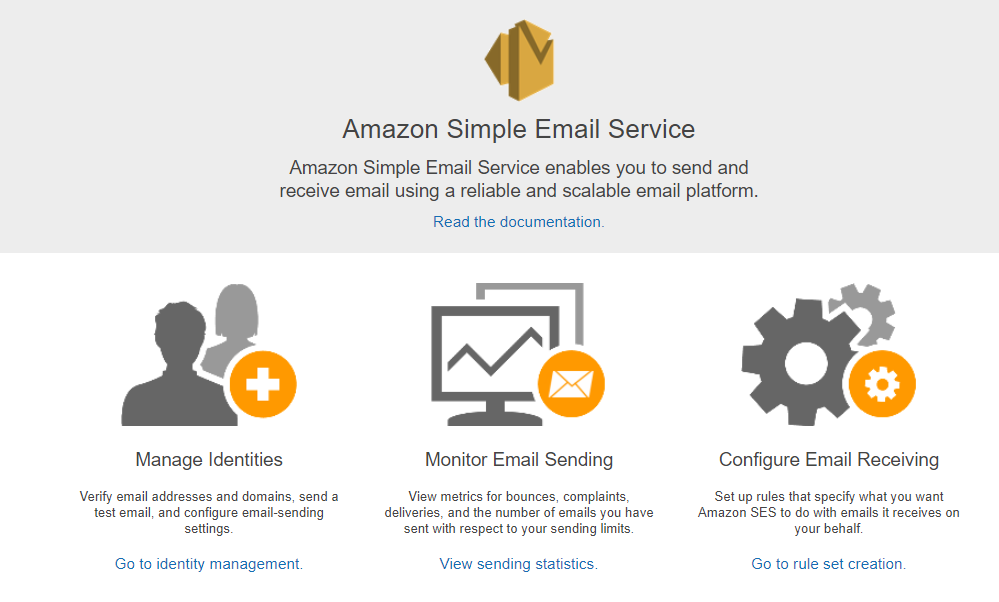
Once logged in aws console click the ‘Simple Email Service’ under the ‘Customer Engagement’. You will see below option.

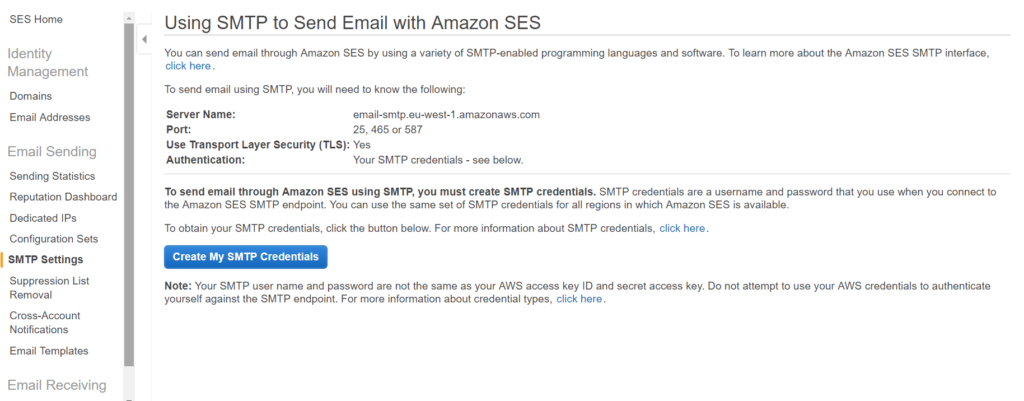
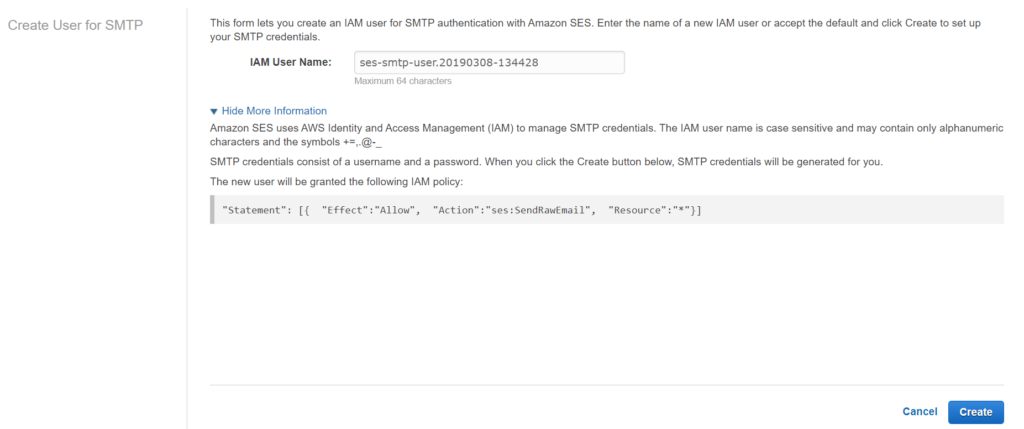
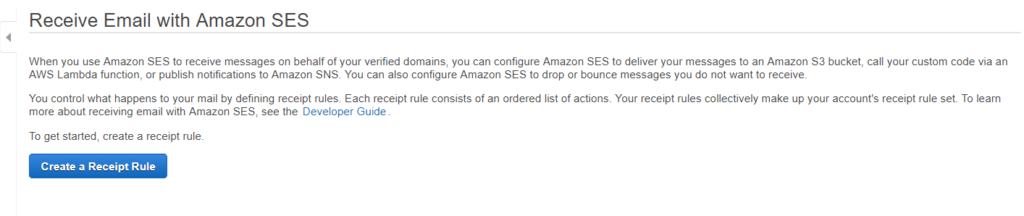
Clock ‘Create’
Create Receipt Rule
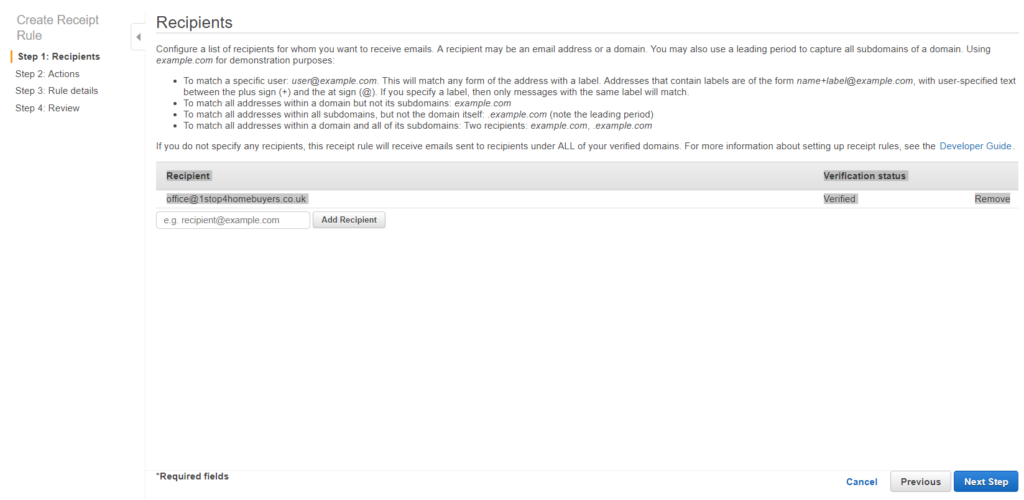
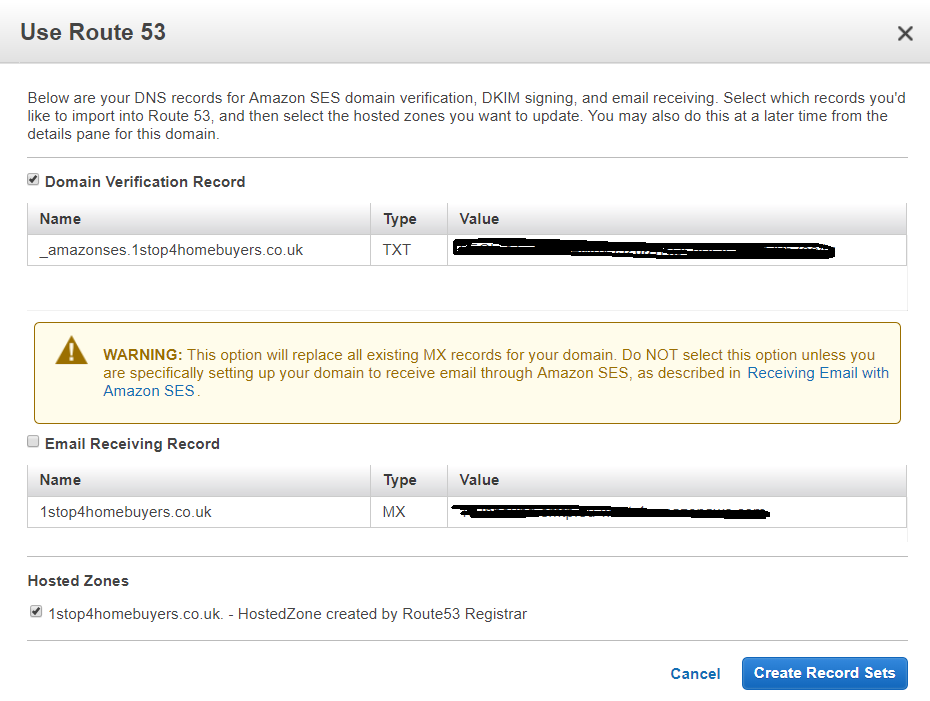
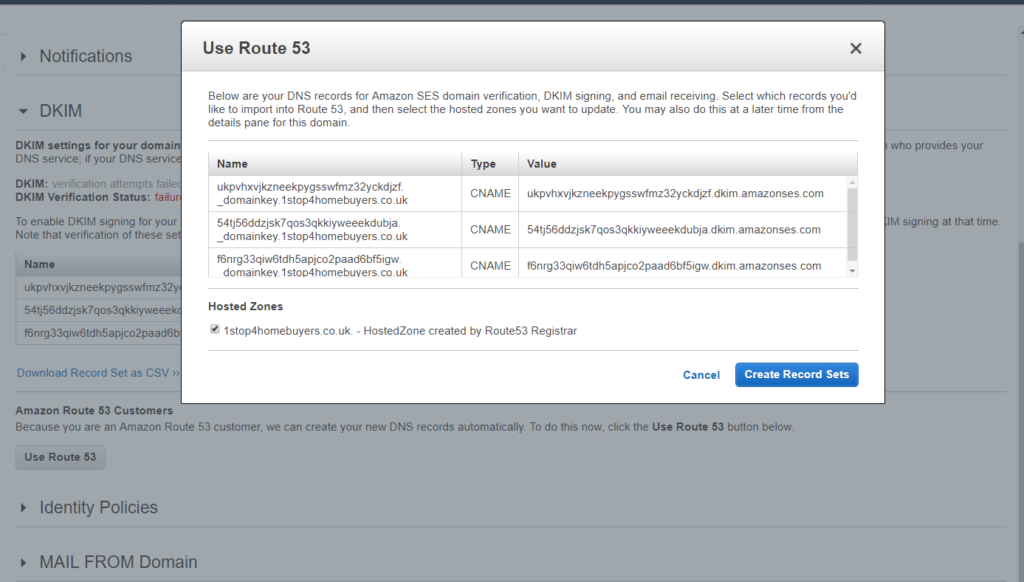
Note: Once clicked you will see the receipt add and ‘Verification Status’ and option to remove.