
How to install ansible on ubuntu linux.
What is Ansible?
Developed by Red Hat, Ansible is an open-source tool renowned for its simplicity and flexibility in IT automation. Unlike other management tools, it doesn’t require custom agents on nodes and uses SSH for secure connections, making it lightweight and easy to adopt. Ansible stands out as an exceptional automation tool, streamlining complex software setups, managing tasks with ease, and facilitating efficient application deployments.
What Ansible is used for?
Ansible makes configuration management, application deployment, and complex workflows easier. Its declarative language lets you describe your infrastructure in code, which can be version-controlled and shared among team members. Ansible’s capability to handle multiple tasks simultaneously and its modular design makes it a go-to choice for scalable and efficient automation.
What are Ansible features?
Ansible doesn’t use agents, servers, or additional security infrastructure, making it easy to deploy and integrate with hybrid environments. With Ansible, you can remotely install software and change systems settings without having to install anything on the systems you’re controlling. It use push model.
Prerequisites
- To show how to install and set Ansible in this guide, we use three computers with Ubuntu 22.04. One is the control machine, and the other two are managed hosts.
- On the control machine, we install Ansible. This machine uses SSH to manage the hosts.
- An Ansible host is a computer that the control machine controls using Ansible. This means any computer that the control machine can automate tasks on.
- You need sudo rights to run commands in the terminal.
Run your deployments in a scalable and cost-effective open cloud infrastructure. Cherry Servers’ secure virtual private servers offer automatic scaling, flexible pricing, and 24/7 technical support.
How to install Ansible on Ubuntu 22.04.
Step 1: Verify sudo privileges and update system packages.
lsb_release -a
sudo apt update
sudo apt upgrade -y
Step 2: Add Ansible PPA (Personal Package Archive)
sudo apt-add-repository -y ppa:ansible/ansible
sudo apt-get update
Step 3: Install Ansible and verify the installation
sudo apt-get install -y ansible
ansible –version
Installing Ansible on Ubuntu is a straightforward process, especially when compared to other complex IT systems. Below, we will show how to install Ansible on Ubuntu 22.04 in six steps. The Ansible installation mainly involves setting up the control machine and establishing reliable communication channels with the managed hosts.
The key steps to install Ansible on Ubuntu 22.04 include the following:
- Verifying sudo privileges and updating system packages
- Adding Ansible PPA
- Installing Ansible and verifying the installation
- Setting up the host machine
- Setting up SSH keys in host machines
Step 1: Verify sudo privileges and update system packages.
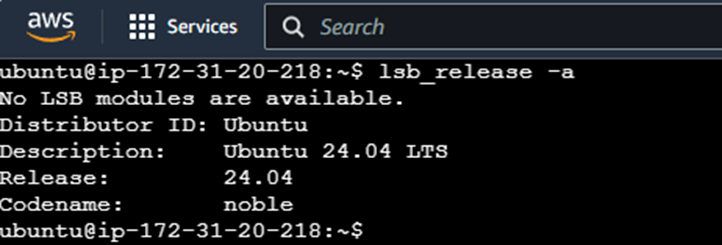
Open the Ansible control machine terminal and run any sudo command, like sudo apt update, to see if you encounter any errors. If you don’t see any errors, you have the necessary sudo privileges. Moreover, run the following command to check the Ubuntu version of your control machine.
lsb_release -a
It is always a good practice to update the existing packages and repositories before starting with the Ansible installation. It ensures the packages have their latest versions, installs security patches, and resolves dependencies. It also helps maintain consistency with the new software installation.
Open the terminal of the Ansible control machine and type sudo apt update command to fetch the latest updates.
sudo apt update

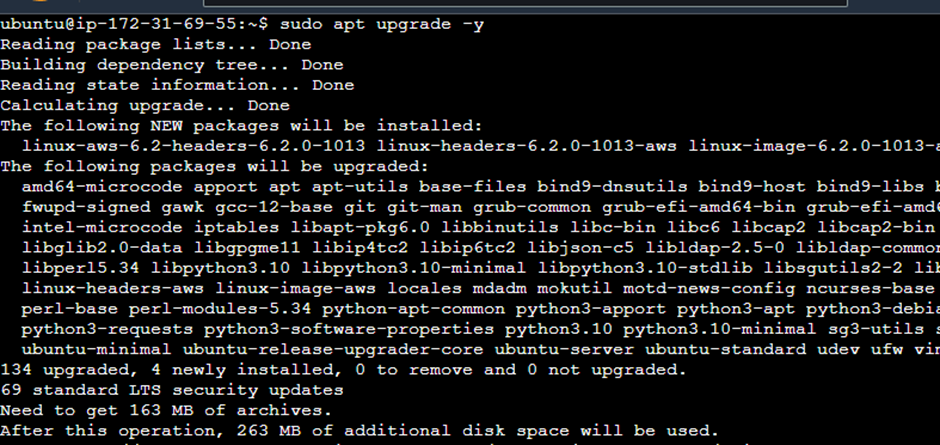
Now upgrade all the installed packages on your system to their latest versions based on the information obtained from the previous command.
sudo apt upgrade -y
Step 2: Add Ansible PPA (Personal Package Archive)
The Ansible Personal Package Archive (PPA) repository allows developers to update Ansible with the latest versions. Ansible PPA shares the latest software, especially when the official Ubuntu sources do not have the latest packages.
The Ansible PPA provides an easy way to install the latest stable Ansible versions on the Ubuntu operating system. It allows them to always have the most up-to-date releases without relying solely on the official channels, which may be a bit behind. Following is the command used to add the package archive.
sudo apt-add-repository -y ppa:ansible/ansible
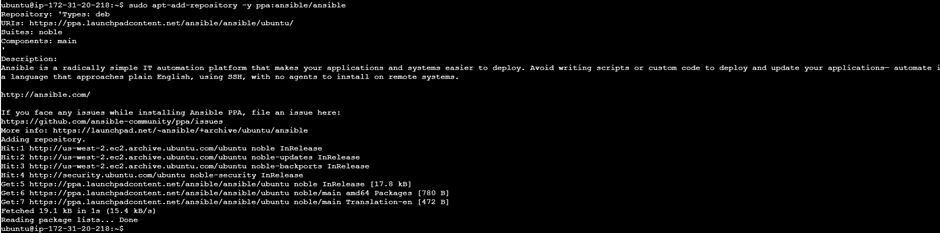
Next, execute the sudo apt update command again to update the system package index. This command is important for the Ubuntu system to identify the newly added PPA.
sudo apt-get update

Step 3: Install Ansible and verify the installation
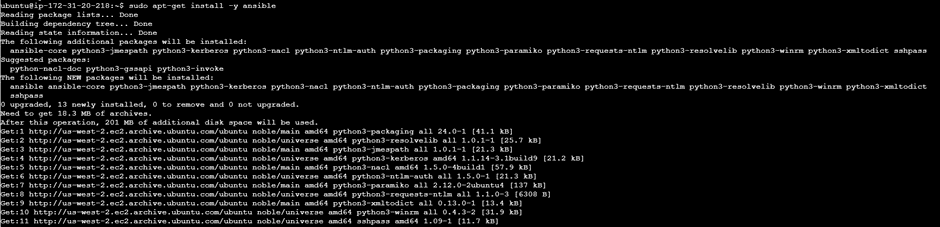
With the Ansible PPA added you can now continue to install Ansible on Ubuntu. Use the following command to initiate the installation. This command fetches and installs the latest stable version of Ansible from the PPA.
sudo apt-get install -y ansible
You can also use the following combined command to install Ansible without interruption.
sudo add-apt-repository –yes –update ppa:ansible/ansible
Verify the installation using the following command.
ansible –version

It will provide the following information regarding the installation: Ansible configuration, python version, and collection and module information.
- ansible [core 2.15.5] – Currently installed Ansible version;
- config file – The Ansible configuration file path;
- configured module search path – Directories where Ansible will search for modules;
- Ansible Python module location;
- ansible collection location – Collections are a distribution format for Ansible content, including playbooks, ansible roles, modules, and plugins;
- executable location: The path to the Ansible executable;
- Python version;
- jinja version – The version of the Python templating engine. Ansible uses Jinja2 for template need, such as generating template configuration files;
- libyaml = True – This line indicates the user of the LibYAML library. LibYAML allows faster reading of YAML files. It is better to set it to true since Ansible relies heavily on YAML for tasks such as playbooks and settings.
The machine will act as the “Ansible control node” after completing the above steps.
Step 4: Host machine setup
After setting up the Ansible control node, the next step is to prepare the host machines where Ansible tasks will be executed. You need to add these machines to the control node’s inventory file, which is typically located at /etc/ansible/hosts. The following image shows an example of this file.
cat /etc/ansible/hosts
The inventory file contains information about all the hosts that Ansible will manage. It is created by default when you install Ansible. In this file, you have the option to organize hosts into different groups based on their roles or functions, like web servers, database servers, and development servers, or categorize them by operating system. This organizational structure helps in managing the hosts more effectively.
In the inventory file, you can list the hosts either by their hostname or IP address, and the file typically includes examples to guide you in specifying these details.
To edit the inventory file, use one of the following commands.
vi /etc/ansible/hosts
sudo nano /etc/ansible/hosts
Moreover, if you wish to create a custom inventory file, it can be done in any location. Use the ‘-i’ parameter when executing ansible playbook or commands.
For this step, assign the following private IP addresses to your host machines under the ‘AppServers’ group, then save the changes.
[appServers]
172.31.21.153
172.31.19.136
myriad of pre-built playbooks, modules, and plugins that you can use each with its capabilities and limitations. You can find in-depth Ansible documentation on the official [Ansible website(https://docs.ansible.com/).