Terraform fundamentals

Terraform terminologies.

Let’s start Terraform, and understand some key terminologies and concepts. Here are some fundamental terms and explanations.

  1. Provider: A provider is a plugin for Terraform that defines and manages resources for a specific cloud or infrastructure platform. Examples of providers include AWS, Azure, Google Cloud, and many others. You configure providers in your Terraform code to interact with the desired infrastructure platform.
  2. Resource: A resource is a specific infrastructure component that you want to create and manage using Terraform. Resources can include virtual machines, databases, storage buckets, network components, and more. Each resource has a type and configuration parameters that you define in your Terraform code.
  3. Module: A module is a reusable and encapsulated unit of Terraform code. Modules allow you to package infrastructure configurations, making it easier to maintain, share, and reuse them across different parts of your infrastructure. Modules can be your own creations or come from the Terraform Registry, which hosts community-contributed modules.
  4. Configuration File: Terraform uses configuration files (often with a .tf extension) to define the desired infrastructure state. These files specify providers, resources, variables, and other settings. The primary configuration file is usually named main.tf, but you can use multiple configuration files as well.
  5. Variable: Variables in Terraform are placeholders for values that can be passed into your configurations. They make your code more flexible and reusable by allowing you to define values outside of your code and pass them in when you apply the Terraform configuration.
  6. Output: Outputs are values generated by Terraform after the infrastructure has been created or updated. Outputs are typically used to display information or provide values to other parts of your infrastructure stack.
  7. State File: Terraform maintains a state file (often named terraform.tfstate) that keeps track of the current state of your infrastructure. This file is crucial for Terraform to understand what resources have been created and what changes need to be made during updates.
  8. Plan: A Terraform plan is a preview of changes that Terraform will make to your infrastructure. When you run terraform plan, Terraform analyzes your configuration and current state, then generates a plan detailing what actions it will take during the apply step.
  9. Apply: The terraform apply command is used to execute the changes specified in the plan. It creates, updates, or destroys resources based on the Terraform configuration.
  10. Workspace: Workspaces in Terraform are a way to manage multiple environments (e.g., development, staging, production) with separate configurations and state files. Workspaces help keep infrastructure configurations isolated and organized.
  11. Remote Backend: A remote backend is a storage location for your Terraform state files that is not stored locally. Popular choices for remote backends include Amazon S3, Azure Blob Storage, or HashiCorp Terraform Cloud. Remote backends enhance collaboration and provide better security and reliability for your state files.

These are some of the essential terms you’ll encounter when working with Terraform. As you start using Terraform for your infrastructure provisioning and management, you’ll become more familiar with these concepts and how they fit together in your IaC workflows.

Why Terraform ?

There are multiple reasons why Terraform is used over the other IaC tools but below are the main reasons.

  1. Multi-Cloud Support: Terraform is known for its multi-cloud support. It allows you to define infrastructure in a cloud-agnostic way, meaning you can use the same configuration code to provision resources on various cloud providers (AWS, Azure, Google Cloud, etc.) and even on-premises infrastructure. This flexibility can be beneficial if your organization uses multiple cloud providers or plans to migrate between them.
  2. Large Ecosystem: Terraform has a vast ecosystem of providers and modules contributed by both HashiCorp (the company behind Terraform) and the community. This means you can find pre-built modules and configurations for a wide range of services and infrastructure components, saving you time and effort in writing custom configurations.
  3. Declarative Syntax: Terraform uses a declarative syntax, allowing you to specify the desired end-state of your infrastructure. This makes it easier to understand and maintain your code compared to imperative scripting languages.
  4. State Management: Terraform maintains a state file that tracks the current state of your infrastructure. This state file helps Terraform understand the differences between the desired and actual states of your infrastructure, enabling it to make informed decisions when you apply changes.
  5. Plan and Apply: Terraform’s “plan” and “apply” workflow allows you to preview changes before applying them. This helps prevent unexpected modifications to your infrastructure and provides an opportunity to review and approve changes before they are implemented.
  6. Community Support: Terraform has a large and active user community, which means you can find answers to common questions, troubleshooting tips, and a wealth of documentation and tutorials online.
  7. Integration with Other Tools: Terraform can be integrated with other DevOps and automation tools, such as Docker, Kubernetes, Ansible, and Jenkins, allowing you to create comprehensive automation pipelines.
  8. HCL Language: Terraform uses HashiCorp Configuration Language (HCL), which is designed specifically for defining infrastructure. It’s human-readable and expressive, making it easier for both developers and operators to work with.

Terraform workspace, locals and variables.

Using workspace you can provision more than one environments. To do this using workspaces, you first create a workspace called dev using the terraform workspace new command:

$ terraform workspace new prod

terraform workspace new prod

terraform apply

… output trimmed..

As you can see new workspace ‘prod’ is created and new infrastructure is provisioned.

Note: * prod (* is showing current workspace).

terraform workspace select default

Now there are 6 instances up and running…

Question: How to change the server names and tags in PROD?

All commands will be applicable to current worspace.

After destroying prod, still you will be there. If you want to work in another env, change to it.

Terraform count and for_each

count

The count parameter in Terraform allows you to create a specified number of identical resources. It is an integral part of a resource block that defines how many instances of a particular resource should be created.

Pros:

  • Simple to use: The count parameter is straightforward for creating multiple instances of a resource.
  • Suitable for homogeneous resources: When all the resources you’re creating are identical except for an identifier, count is likely a good fit.

Cons:

  • Lacks key-based identification: count doesn’t include a way to address a resource with a unique key directly; you have to rely on an index.
  • Immutable: If you remove an item from the middle of the count list, Terraform marks all subsequent resources for recreation which can be disruptive in certain scenarios.

count = 3 is added.

One EC2 had already been created, therefore it added 2 more. This feature is called… ” “.

Screenshot from aws console.

for_each

The for_each loop in Terraform, used within the for_each argument, iterates over a map or a set of strings, allowing you to create resources that correspond to the given elements.

Pros:

  • Detailed declaration: for_each provides greater control when creating resources that require specific attributes or configurations.
  • Key-based identification: Resources created with for_each can be directly identified and accessed by their keys, making modifications more manageable.
  • Non-destructive updates: If you remove an item from the map or set, only that specific resource will be affected.

Cons:

  • Complexity: for_each is more complex to use than count and requires more planning.
  • Requires a set or map: You must provide a set or map of items to iterate over, which might not be necessary or straightforward for all situations.

When to Use Count vs. For_each

Both constructs are powerful, but they shine in different situations. Here’s a quick reference to determine which to use:

Use Count when:

  • You need to create a fixed number of similar resources.
  • Resource differences can be represented by an index.

Use For_each when:

  • You’re dealing with a collection of items that have unique identifiers.
  • Your resources are not perfectly identical and require individual configurations.
  • You plan to make future modifications that should not affect all resources.

Terrafom installation creating EC2

Terraform script (main.tf) to create the vpc in aws.

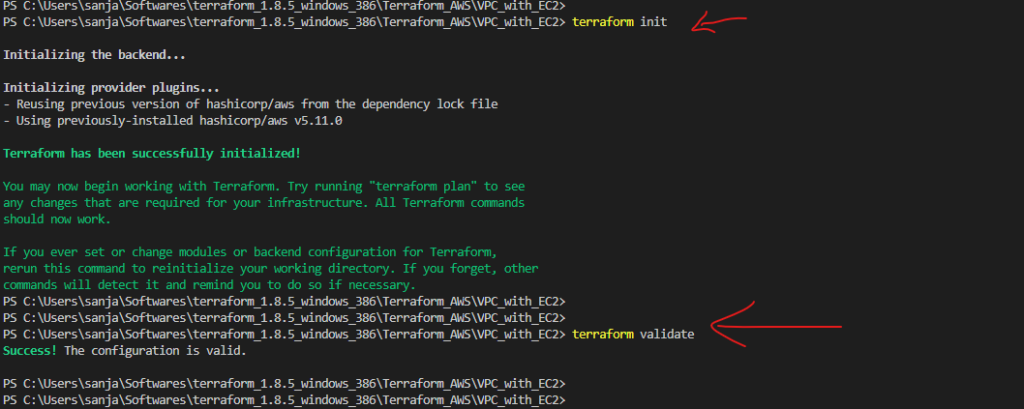
  1. terraform init
  2. terraform validate
  3. terraform plan -out sanjayShonak_vpc
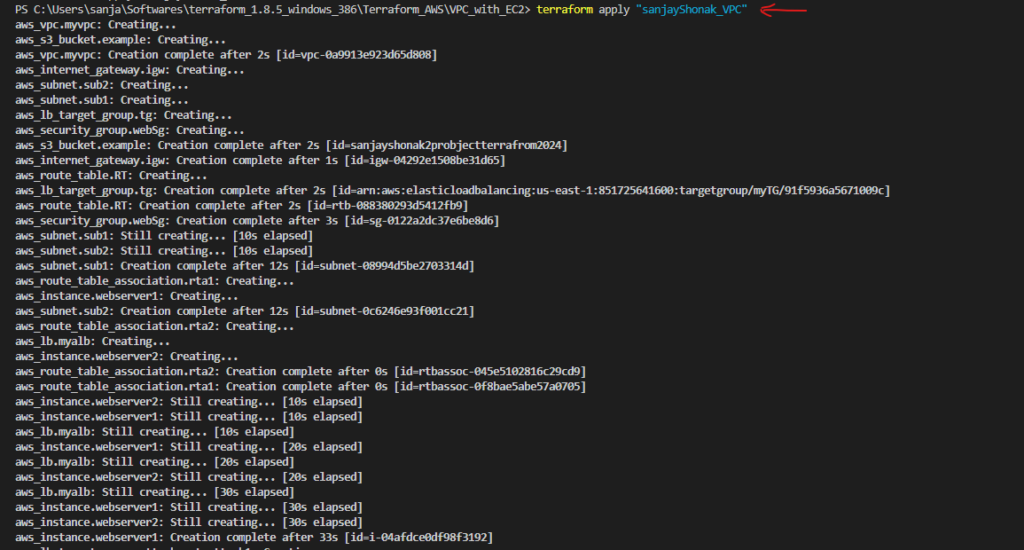
  4. terraform apply “sanjayShonak_VPC”

terraform plan -out sanjayShonak_vpc

… output trimmed…

Note: it’s best practice to provide output file. In that case you can use the command provided at the end.

terraform apply “sanjayShonak_VPC”

… output trimmed. As you can see it has added 16 resources.

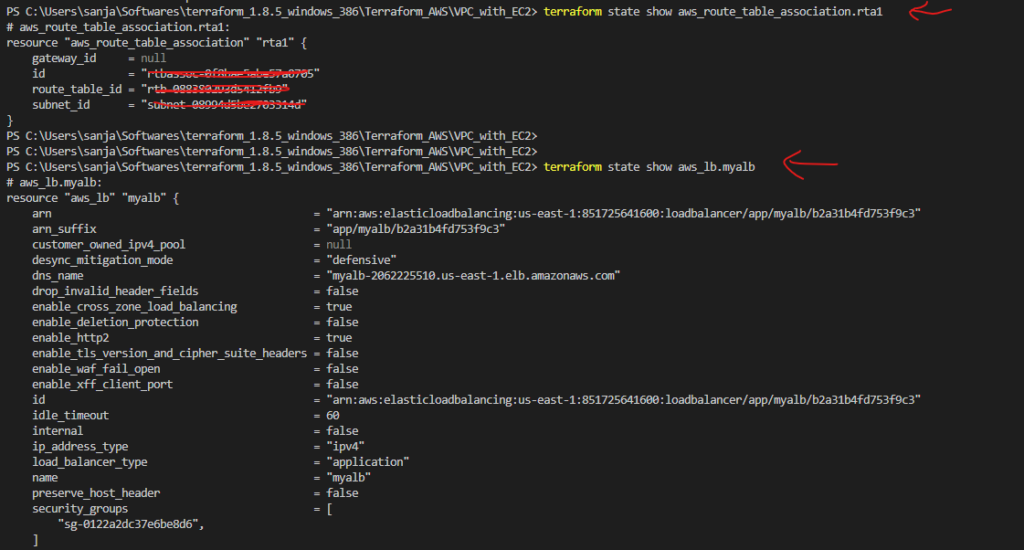
terraform state

This does advanced state management. The state is stored by default in a local file named “terraform.tfstate”, but it can also be stored remotely, which works better in a team environment.

OptionDescription
listList resources in the state.
showShow a resource in the state.
mvMove an item in the state.
rmRemove instances from the state.
pullPull current state and output to stdout.

terraform state list

terraform state show aws_route_table_association.rta1

terraform state show aws_lb.myalb

… output trimmed.

terraform graph

Produces a representation of the dependency graph between different objects in the current configuration and state. The graph is presented in the DOT language. The typical program that can read this format is GraphViz, but many web services are also available to read this format.

terraform graph

terraform destroy

GIT installation and account setup

How to install git

If you’re on Fedora (or any closely-related RPM-based distribution, such as RHEL or CentOS), you can use dnf:

$ sudo dnf install git-all

If you’re on a Debian-based distribution, such as Ubuntu, try apt:

sudo apt install git-all
Note: Output screenshot is trimmed...

… At the end you can check if git is installed properly.

You can install in window using from winget.

winget install –id Git.Git -e –source winget

Note: It was already installed in my case,

git init

git init will created below directories.

Add config and email.

PS C:\Users\sanja\Softwares\git> git config –global user.name “SanjayShonak”
PS C:\Users\sanja\Softwares\git> git config –global user.email “sanjay.shonak@gmail.com”

check if user and email are configured correctly.

git config –list

You can clone your directory from github. You will be asked for user and pwd.

git clone https://github.com/SanjayShonak/Terraform

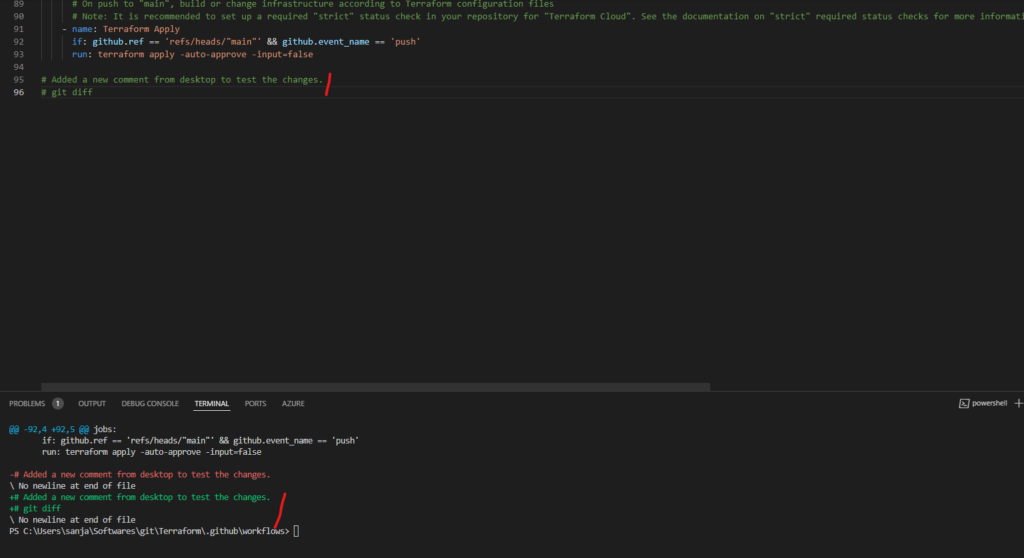
In order to see the difference, git work like linux.

git diff

GIT documents

Ansible configuring target servers.

How to configure target servers in ansbile server.

Note: you must be able to connect to the target server/s without password.

  1. Simple way to generating and copying the ssh keys

You won’t be able to ssh the target server, before ssh keys.

Run below command on both (ansible and target) servers.

ssh-keygen

Below one is Ansible server.

Target server:

Now copy the pub key from Ansible server to authorised_keys in target server.

Ansible server: (Note: These were test servers and they are terminated after this exercise).

Note: you can use below command too.

cat ~/.ssh/id_rsa.pub | ssh username@remote_host “mkdir -p ~/.ssh && touch ~/.ssh/authorized_keys && chmod -R go= ~/.ssh && cat >> ~/.ssh/authorized_keys”

Target server:

Once ssh keys are sorted you should be able to ssh the target server.

Adhoc command

At Ansible server, make sure you have entered the private ip of the all target servers and categorized them. Below are the examples.

ubuntu@ip-172-31-18-85:~$ ansible -i inventory all -m “shell” -a “touch Testdevops”

Now let’s confirm it has created a file Testdevops in target server.

Now let’s run first playbook.

Make sure you have entries of the server/s in inventory file. Also your ansible playbook is written correctly.

Let’s run playbook.

ansible-playbook -i inventory first-playbook.yml

Now let’s check if iginx is installed on the target server.

Installing ansible

How to install ansible on ubuntu linux.

What is Ansible?

Developed by Red Hat, Ansible is an open-source tool renowned for its simplicity and flexibility in IT automation. Unlike other management tools, it doesn’t require custom agents on nodes and uses SSH for secure connections, making it lightweight and easy to adopt. Ansible stands out as an exceptional automation tool, streamlining complex software setups, managing tasks with ease, and facilitating efficient application deployments.

What Ansible is used for?

Ansible makes configuration management, application deployment, and complex workflows easier. Its declarative language lets you describe your infrastructure in code, which can be version-controlled and shared among team members. Ansible’s capability to handle multiple tasks simultaneously and its modular design makes it a go-to choice for scalable and efficient automation.

What are Ansible features?

Ansible doesn’t use agents, servers, or additional security infrastructure, making it easy to deploy and integrate with hybrid environments. With Ansible, you can remotely install software and change systems settings without having to install anything on the systems you’re controlling. It use push model.

Prerequisites

  • To show how to install and set Ansible in this guide, we use three computers with Ubuntu 22.04. One is the control machine, and the other two are managed hosts.
  • On the control machine, we install Ansible. This machine uses SSH to manage the hosts.
  • An Ansible host is a computer that the control machine controls using Ansible. This means any computer that the control machine can automate tasks on.
  • You need sudo rights to run commands in the terminal.

Run your deployments in a scalable and cost-effective open cloud infrastructure. Cherry Servers’ secure virtual private servers offer automatic scaling, flexible pricing, and 24/7 technical support.

How to install Ansible on Ubuntu 22.04.

Step 1: Verify sudo privileges and update system packages.

lsb_release -a

sudo apt update

sudo apt upgrade -y

Step 2: Add Ansible PPA (Personal Package Archive)

sudo apt-add-repository -y ppa:ansible/ansible

sudo apt-get update

Step 3: Install Ansible and verify the installation

sudo apt-get install -y ansible

ansible –version

Installing Ansible on Ubuntu is a straightforward process, especially when compared to other complex IT systems. Below, we will show how to install Ansible on Ubuntu 22.04 in six steps. The Ansible installation mainly involves setting up the control machine and establishing reliable communication channels with the managed hosts.

The key steps to install Ansible on Ubuntu 22.04 include the following:

  • Verifying sudo privileges and updating system packages
  • Adding Ansible PPA
  • Installing Ansible and verifying the installation
  • Setting up the host machine
  • Setting up SSH keys in host machines

Step 1: Verify sudo privileges and update system packages.

Open the Ansible control machine terminal and run any sudo command, like sudo apt update, to see if you encounter any errors. If you don’t see any errors, you have the necessary sudo privileges. Moreover, run the following command to check the Ubuntu version of your control machine.

lsb_release -a

It is always a good practice to update the existing packages and repositories before starting with the Ansible installation. It ensures the packages have their latest versions, installs security patches, and resolves dependencies. It also helps maintain consistency with the new software installation.

Open the terminal of the Ansible control machine and type sudo apt update command to fetch the latest updates.

sudo apt update

Now upgrade all the installed packages on your system to their latest versions based on the information obtained from the previous command.

sudo apt upgrade -y

Step 2: Add Ansible PPA (Personal Package Archive)

The Ansible Personal Package Archive (PPA) repository allows developers to update Ansible with the latest versions. Ansible PPA shares the latest software, especially when the official Ubuntu sources do not have the latest packages.

The Ansible PPA provides an easy way to install the latest stable Ansible versions on the Ubuntu operating system. It allows them to always have the most up-to-date releases without relying solely on the official channels, which may be a bit behind. Following is the command used to add the package archive.

sudo apt-add-repository -y ppa:ansible/ansible

Next, execute the sudo apt update command again to update the system package index. This command is important for the Ubuntu system to identify the newly added PPA.

sudo apt-get update

Step 3: Install Ansible and verify the installation

With the Ansible PPA added you can now continue to install Ansible on Ubuntu. Use the following command to initiate the installation. This command fetches and installs the latest stable version of Ansible from the PPA.

sudo apt-get install -y ansible

You can also use the following combined command to install Ansible without interruption.

sudo add-apt-repository –yes –update ppa:ansible/ansible

Verify the installation using the following command.

ansible –version

It will provide the following information regarding the installation: Ansible configuration, python version, and collection and module information.

  1. ansible [core 2.15.5] – Currently installed Ansible version;
  2. config file – The Ansible configuration file path;
  3. configured module search path – Directories where Ansible will search for modules;
  4. Ansible Python module location;
  5. ansible collection location – Collections are a distribution format for Ansible content, including playbooks, ansible roles, modules, and plugins;
  6. executable location: The path to the Ansible executable;
  7. Python version;
  8. jinja version – The version of the Python templating engine. Ansible uses Jinja2 for template need, such as generating template configuration files;
  9. libyaml = True – This line indicates the user of the LibYAML library. LibYAML allows faster reading of YAML files. It is better to set it to true since Ansible relies heavily on YAML for tasks such as playbooks and settings.

The machine will act as the “Ansible control node” after completing the above steps.

Step 4: Host machine setup

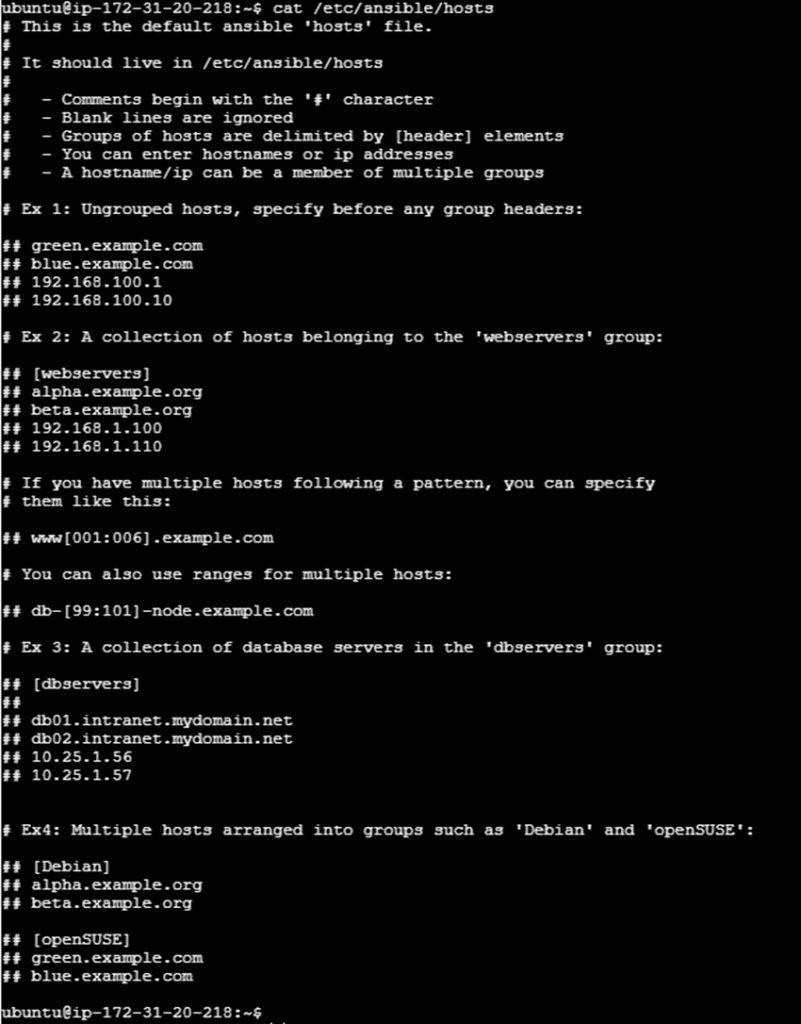
After setting up the Ansible control node, the next step is to prepare the host machines where Ansible tasks will be executed. You need to add these machines to the control node’s inventory file, which is typically located at /etc/ansible/hosts. The following image shows an example of this file.

cat /etc/ansible/hosts

The inventory file contains information about all the hosts that Ansible will manage. It is created by default when you install Ansible. In this file, you have the option to organize hosts into different groups based on their roles or functions, like web servers, database servers, and development servers, or categorize them by operating system. This organizational structure helps in managing the hosts more effectively.

In the inventory file, you can list the hosts either by their hostname or IP address, and the file typically includes examples to guide you in specifying these details.

To edit the inventory file, use one of the following commands.

vi /etc/ansible/hosts

sudo nano /etc/ansible/hosts

Moreover, if you wish to create a custom inventory file, it can be done in any location. Use the ‘-i’ parameter when executing ansible playbook or commands.

For this step, assign the following private IP addresses to your host machines under the ‘AppServers’ group, then save the changes.

[appServers]

172.31.21.153

172.31.19.136

myriad of pre-built playbooks, modules, and plugins that you can use each with its capabilities and limitations. You can find in-depth Ansible documentation on the official [Ansible website(https://docs.ansible.com/).

Jenkins installation steps

How to install Jenkins in linux.

  1. Make sure Java’s latest version is installed or install the one.
  2. Download the Jenkins (
  3. Install the jenkins ( sudo
  4. Start the Jenkins (
  5. Make sure port 8080 (default) is open:
  6. Extract the ip address allocated to server:
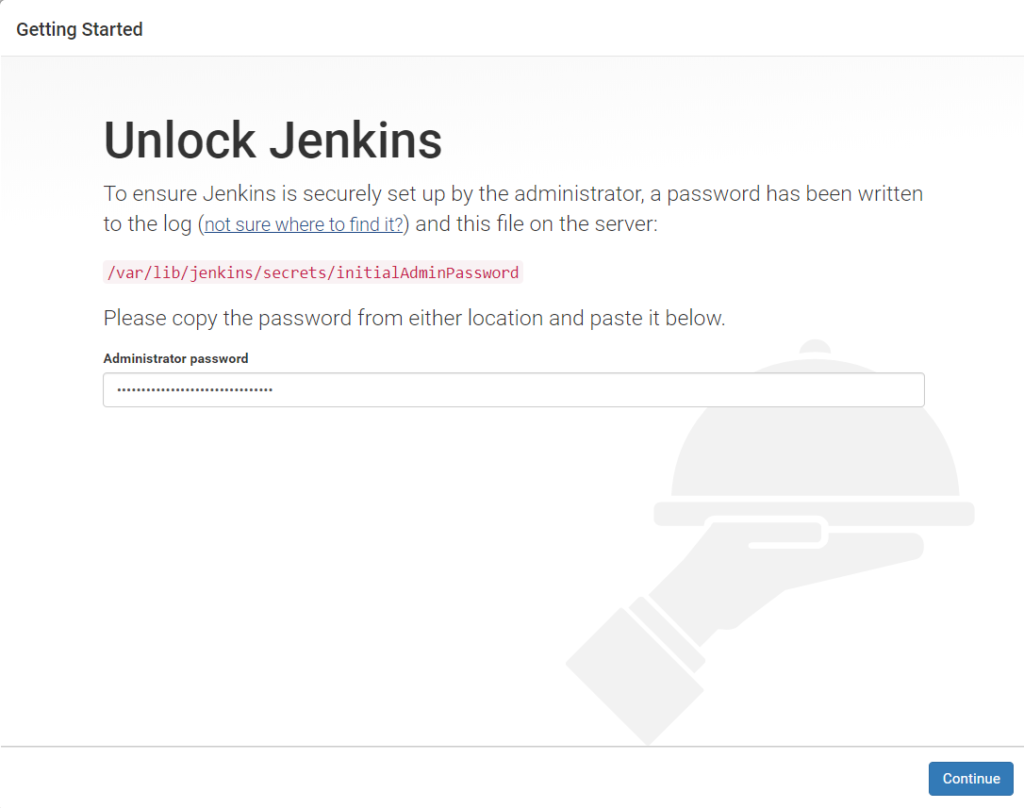
  7. Access the Jenkins in url: ip:8080
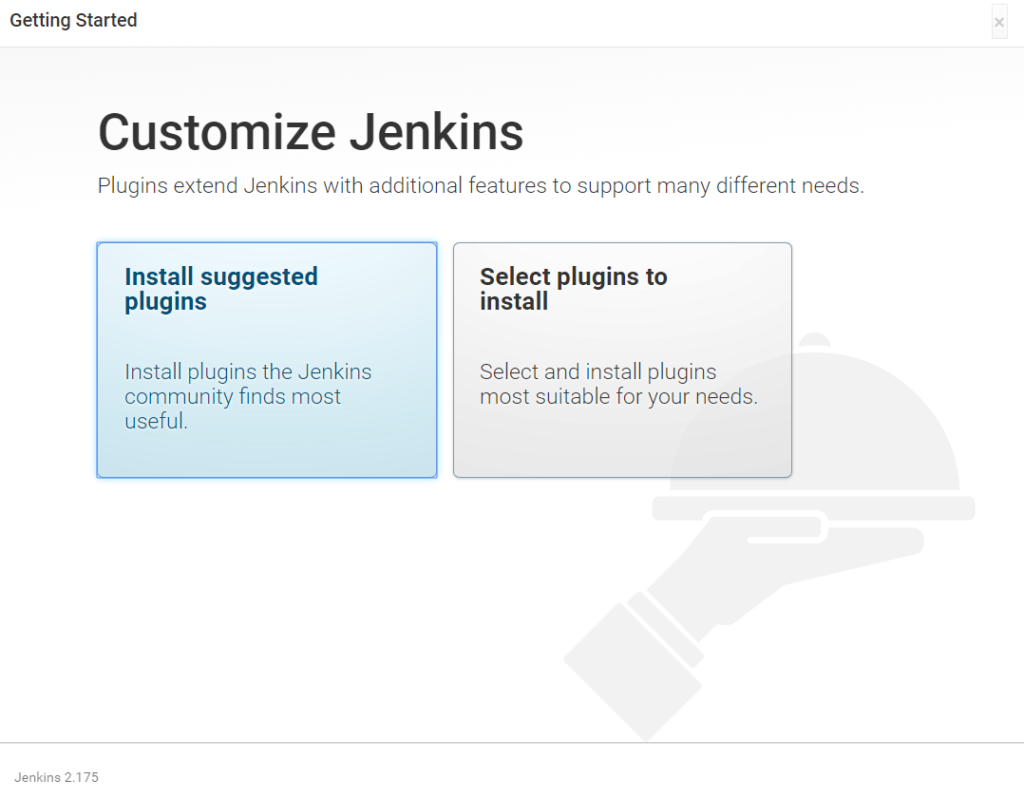
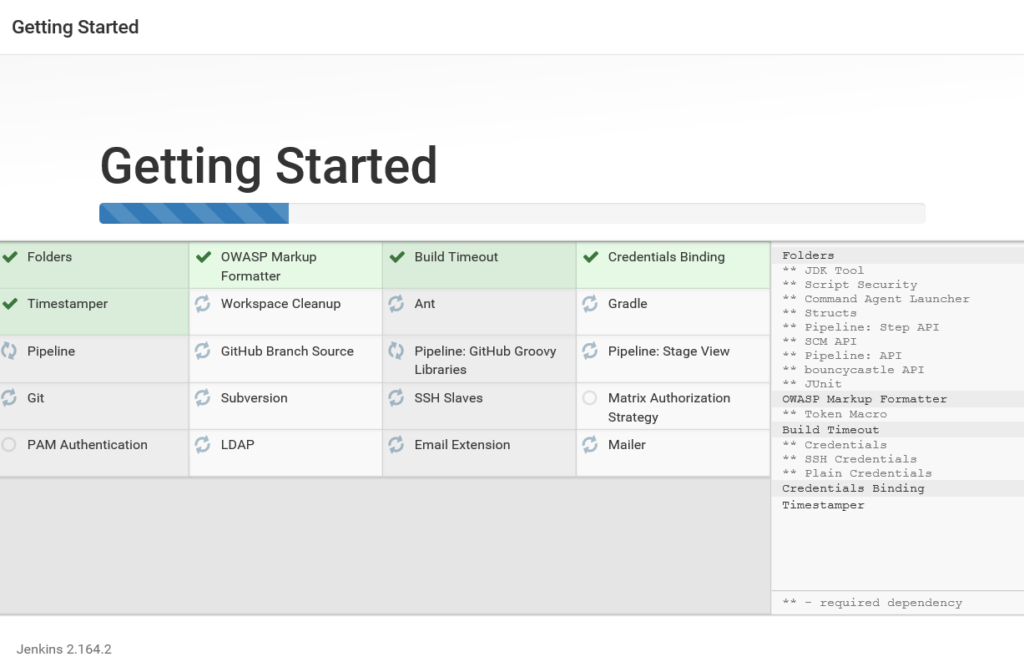
  8. Install the necessary plugins.

Install the necessary plugins

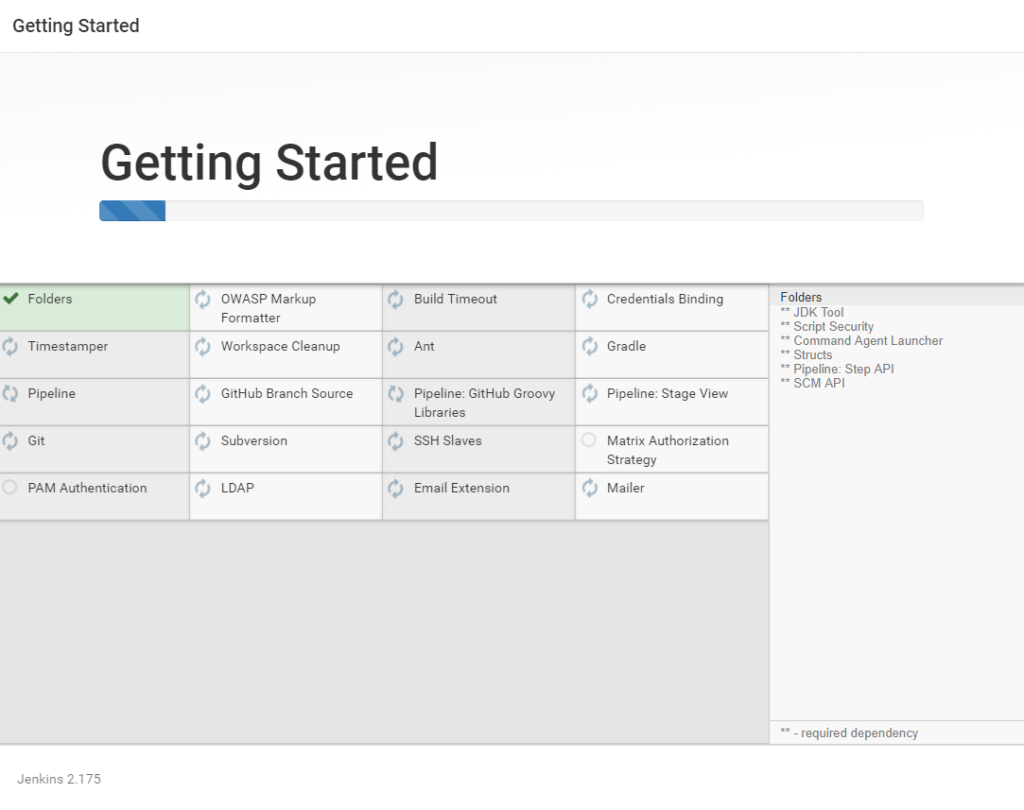
Plugin installation in progress.


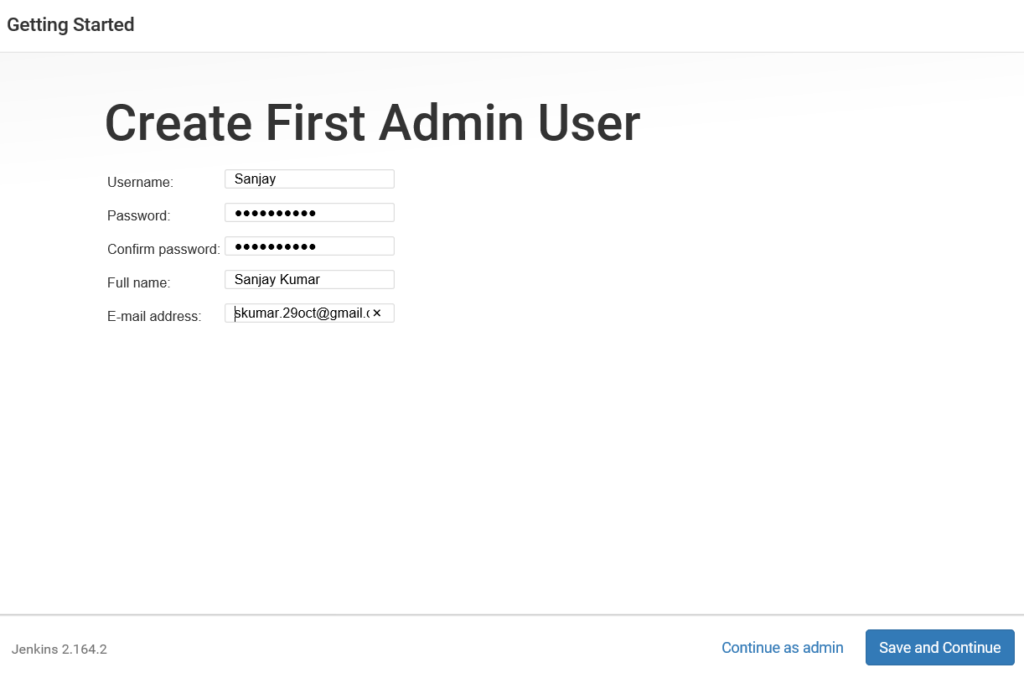
Once you will provide the admin/pwd and email etc. and click ‘Continue as admin’ Jenkins will be ready for use.

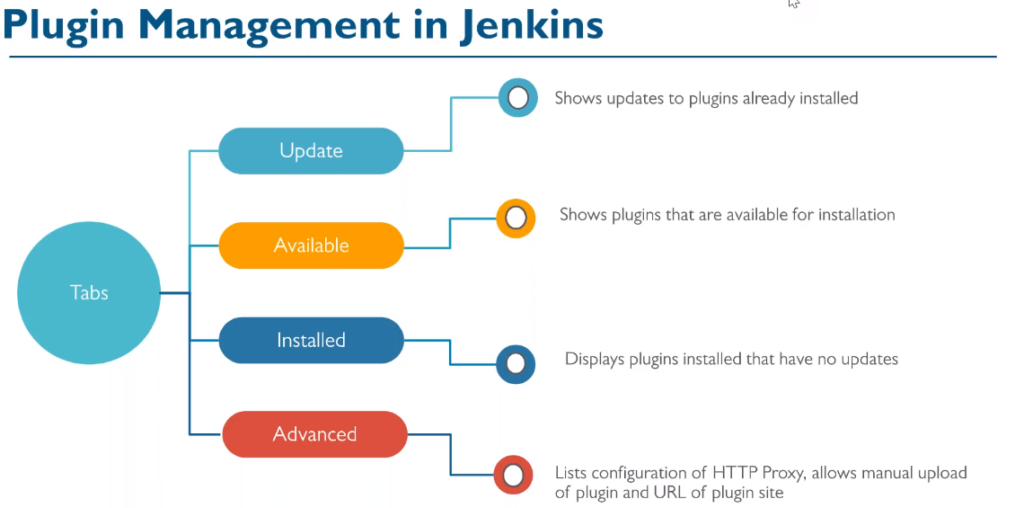
Jenkins plugins at a glance.

Jenkins installation

Pre-requisite for Jenkins installation on Windows, you must have java 8 or later.

In order to install the Jenkins on windows go to URL
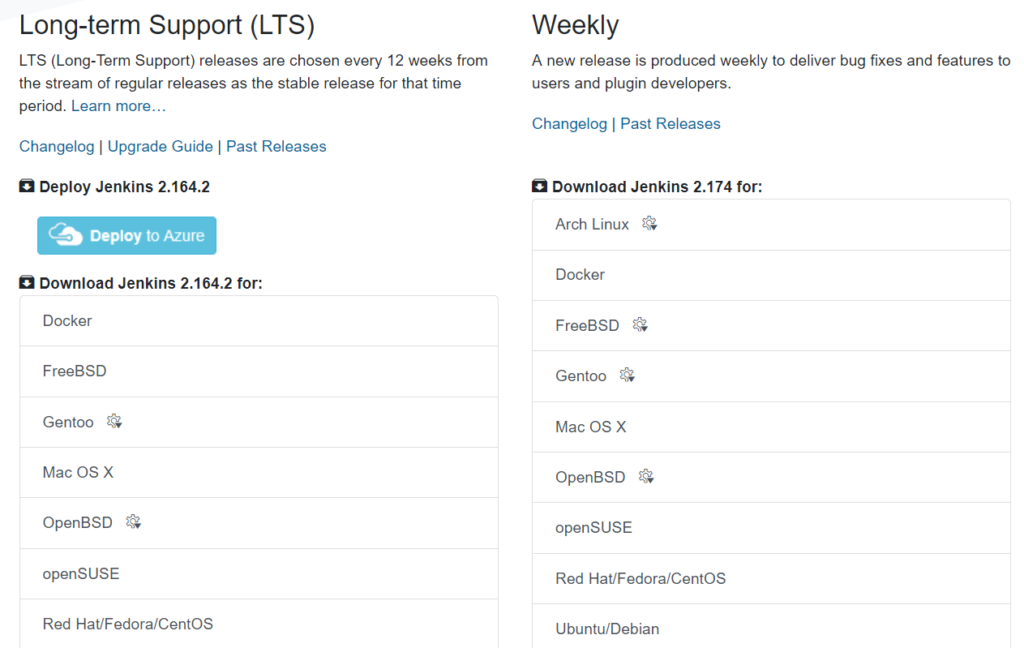
https://jenkins.io and click download. Now select ‘windows’ under the which one LTS or Weekly you want.

Click the downloaded zip file and it will launch the installation GUI.

Keep on clicking the next… and


Now choose the option you want. I would go for suggested plugins.

Once installation will be done you need to set up the admin details.

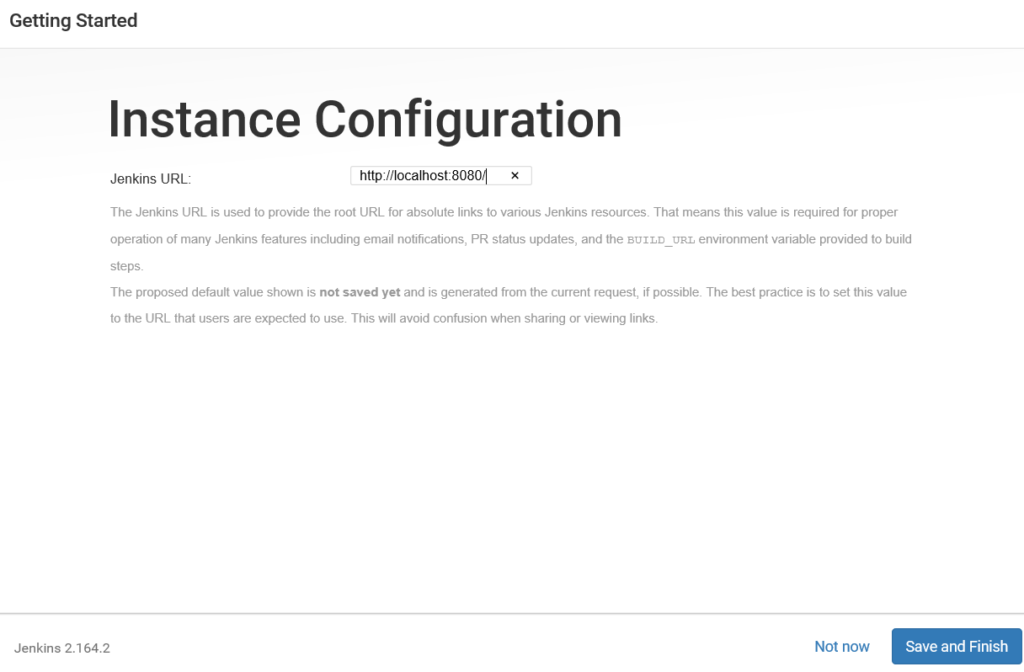
Make by default port is 8080 for Jenkins in windows, click save and finish.

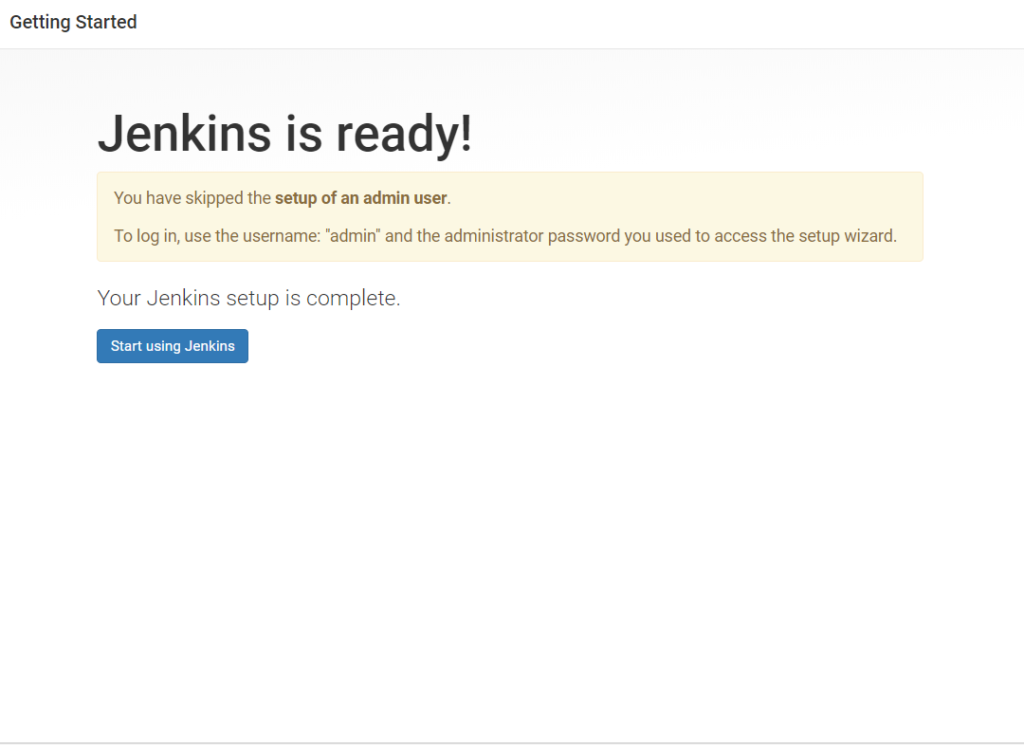
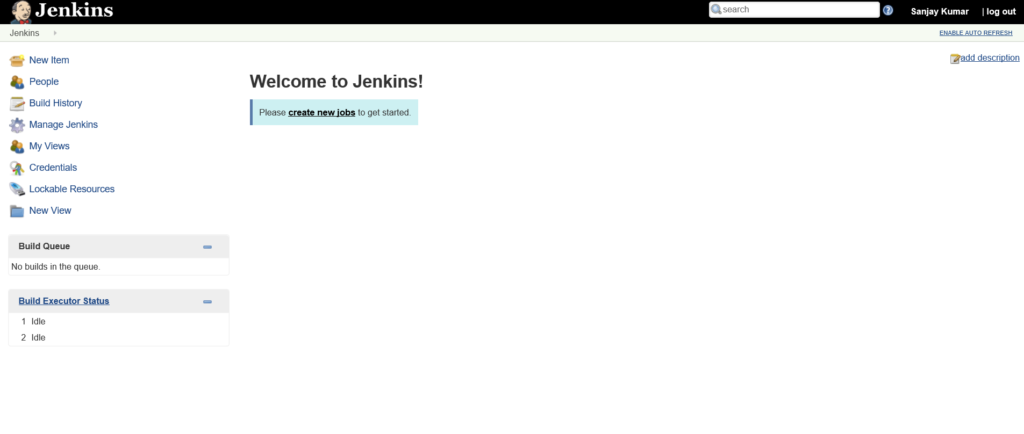
Here is your Jenkins ready for using

Here is the first screen once you login into Jenkins. Did you notice the Enable auto refresh button on the right side?