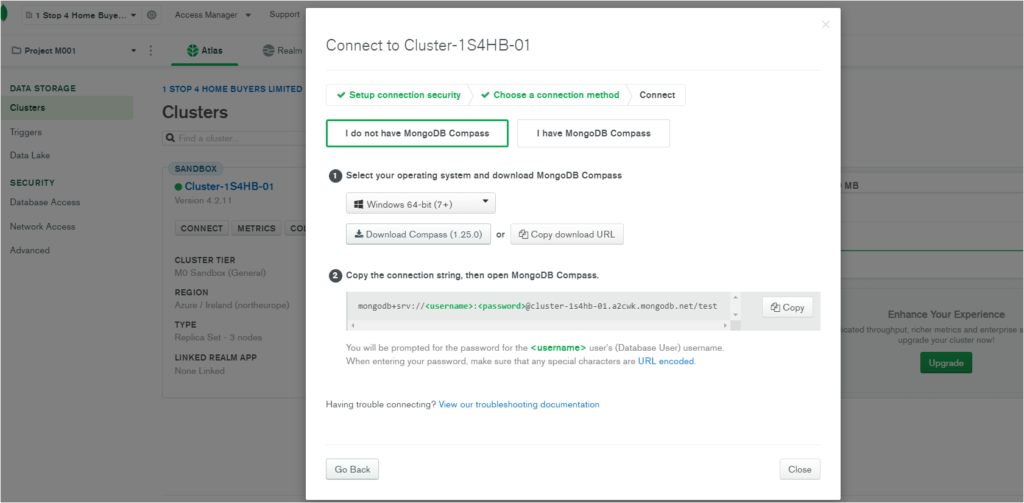
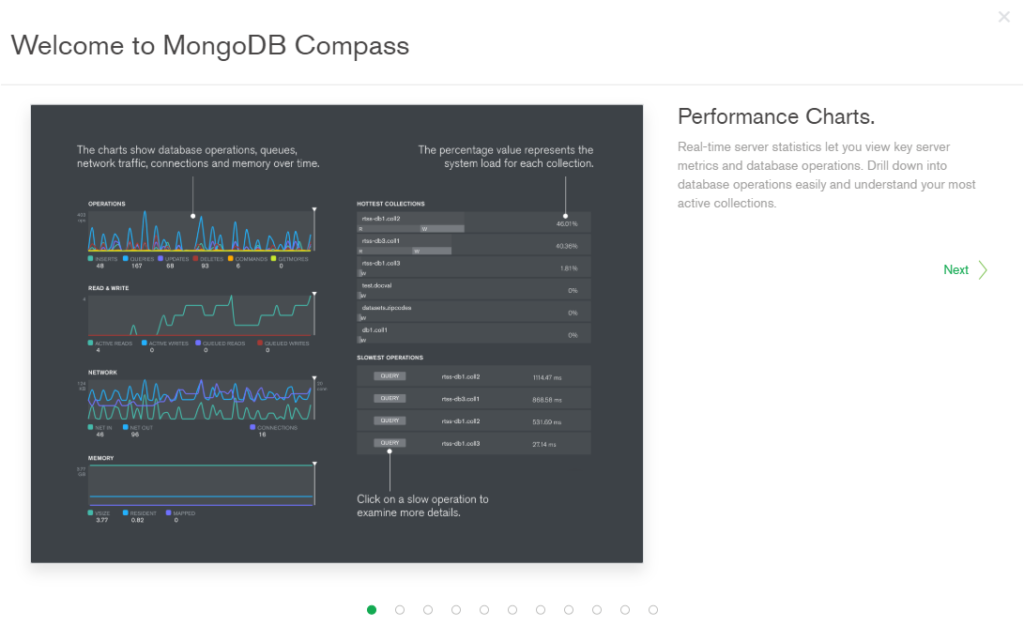
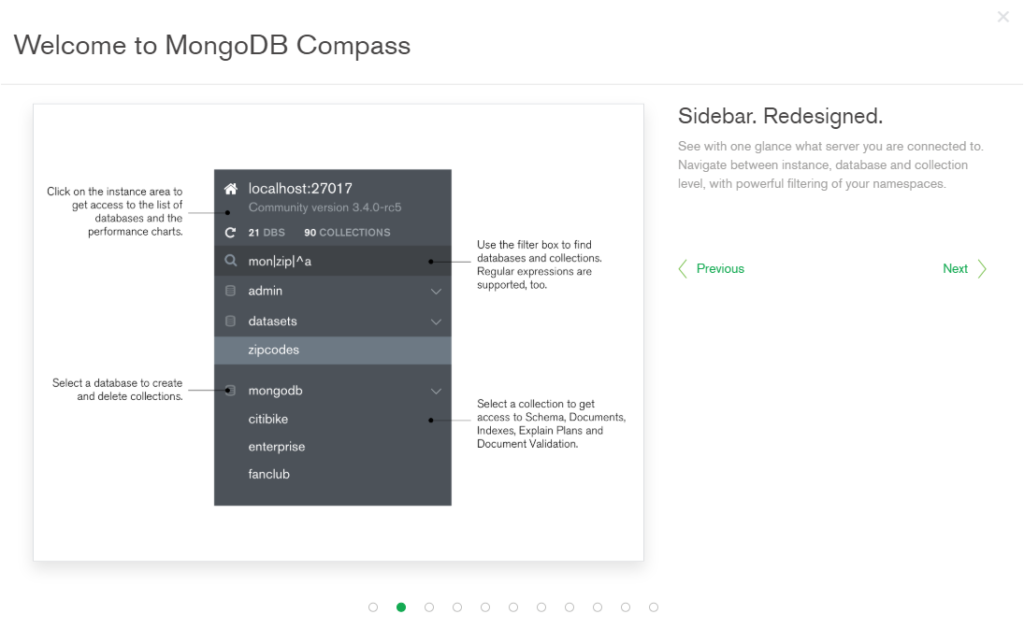
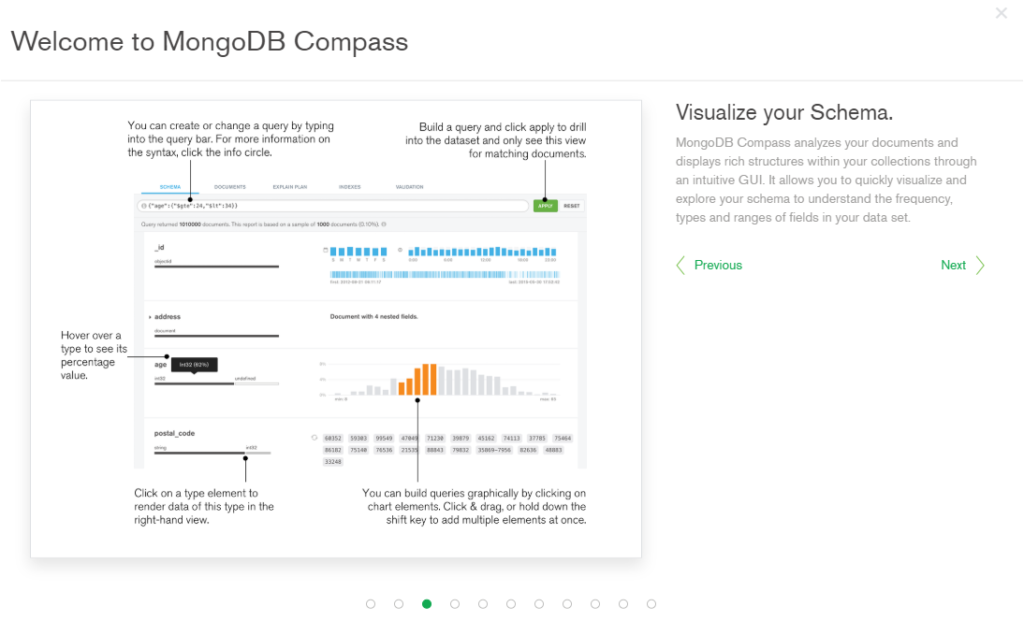
Once you download the compass file and launch it. Below is the journey through screenshots.
What all you can do with MongoDB Compass

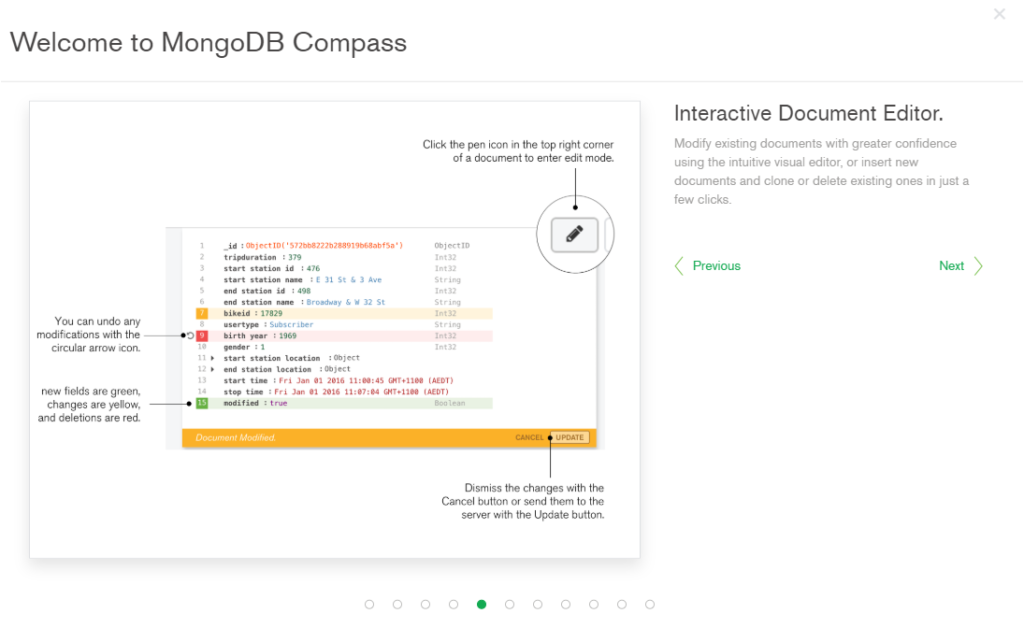
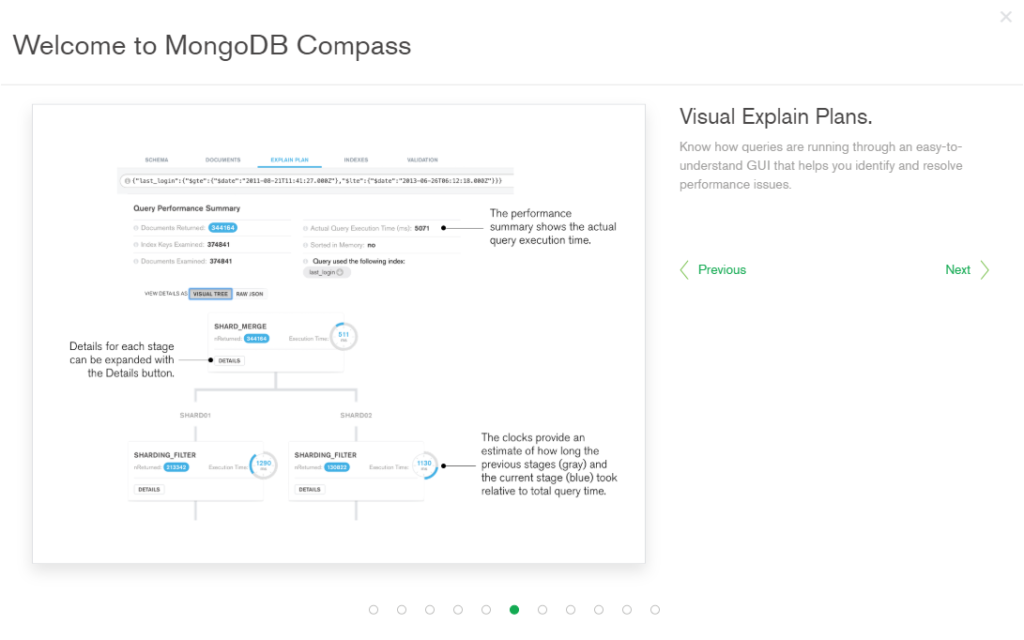
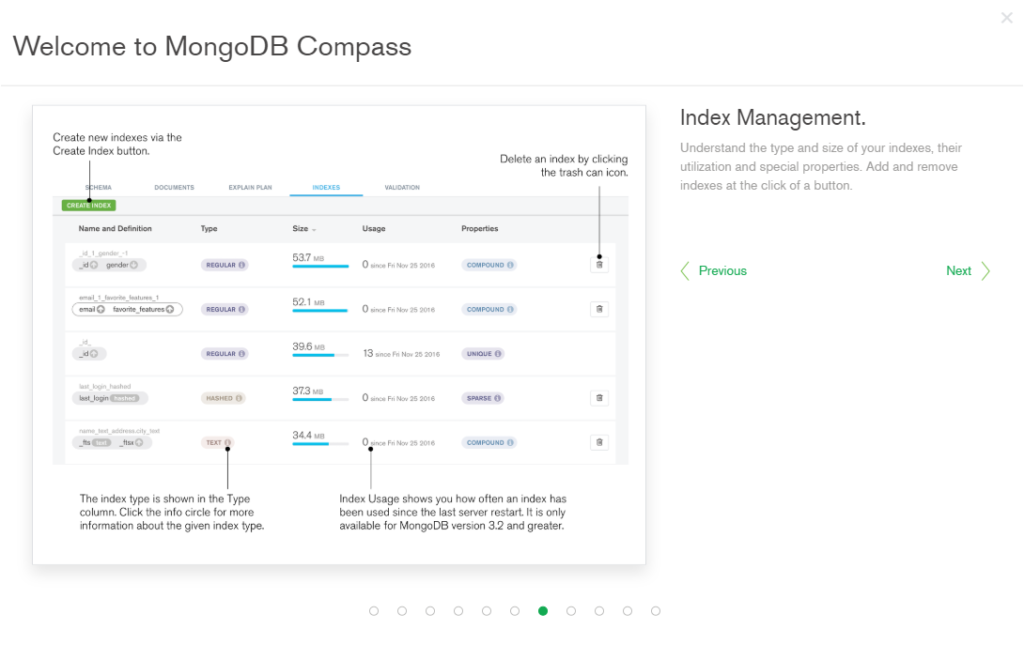
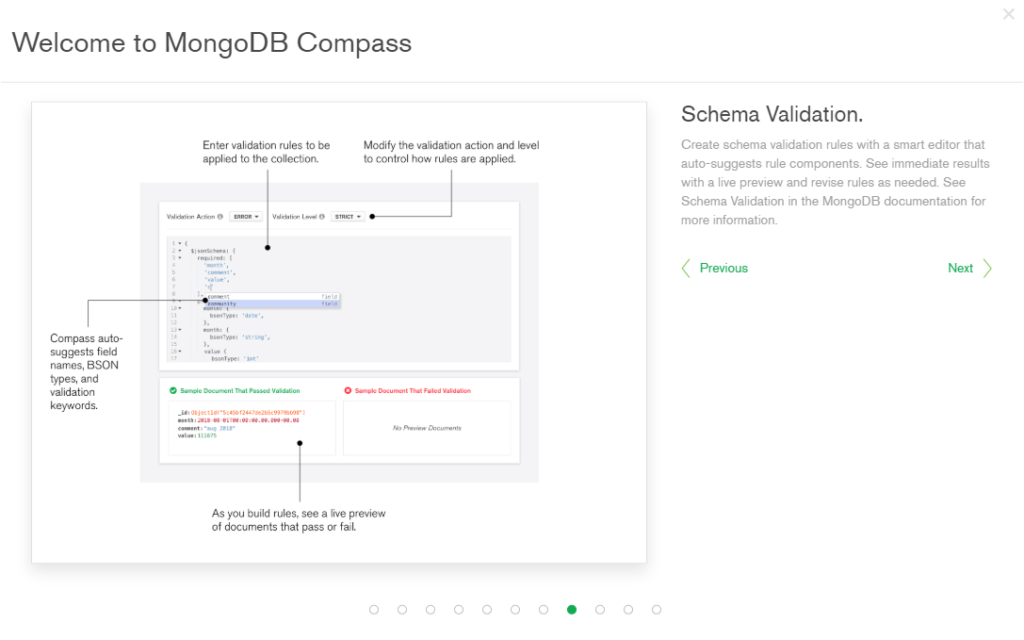
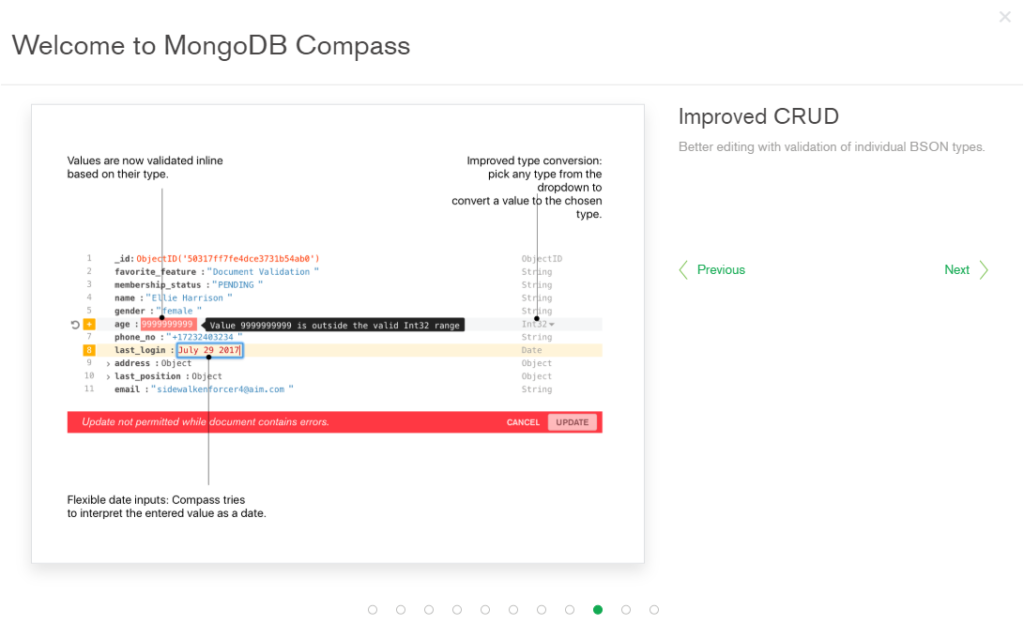
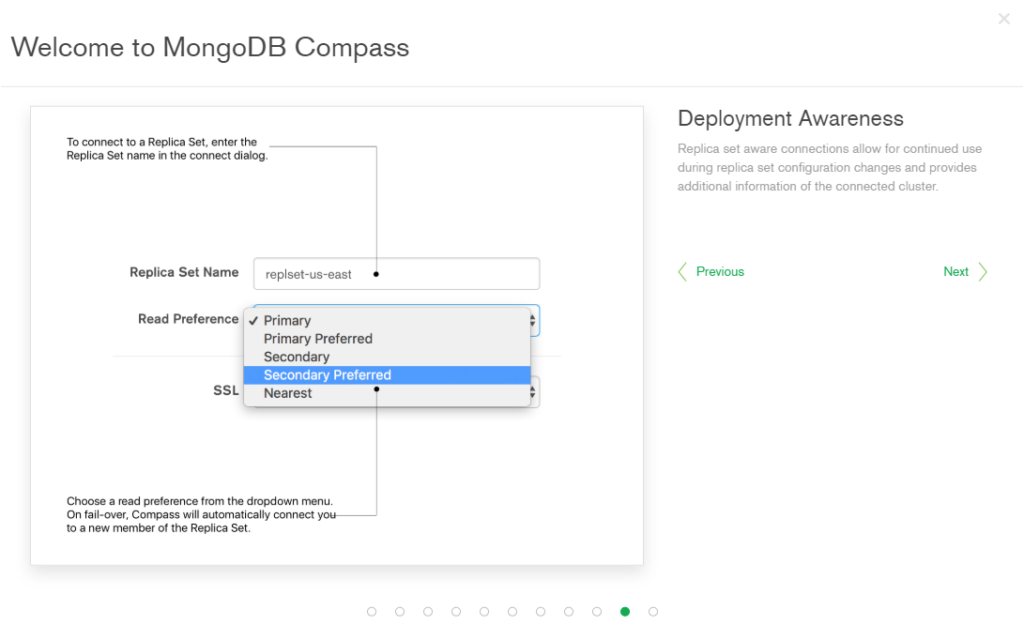
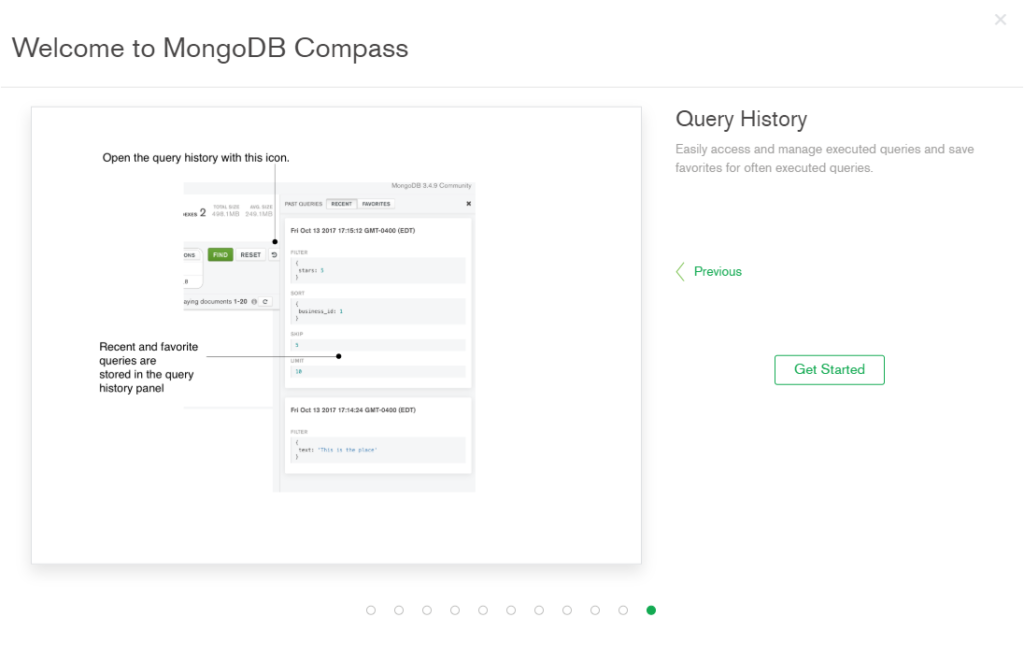

After you connect.
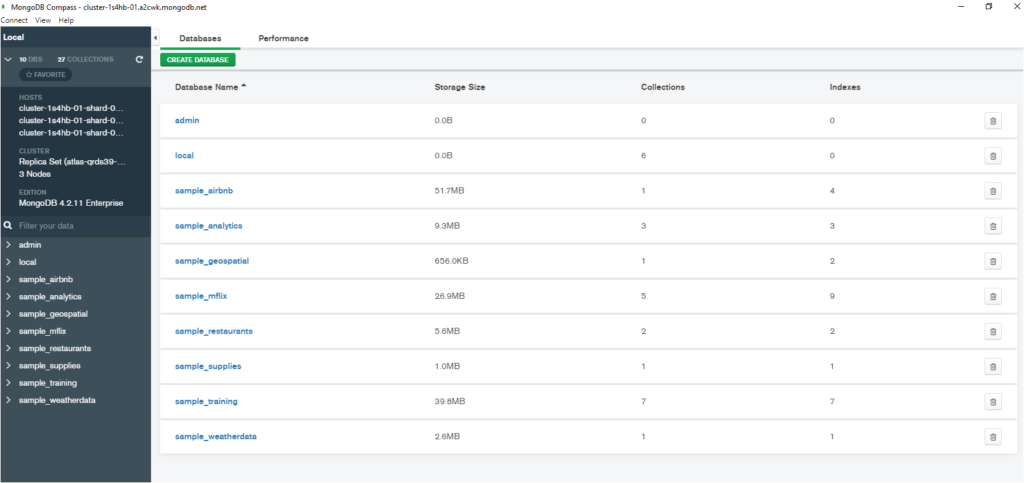
At the time of launch it will show the privacy setting.
Once you download the compass file and launch it. Below is the journey through screenshots.

What all you can do with MongoDB Compass


After you connect.

At the time of launch it will show the privacy setting.
 Data Guard properties more details:


$ dgmgrl [-silent | -echo] [username/password[@connect_identifier] [dgmgrl_command]]
$ dgmgrl  /
$ dgmgrl sys/pwd
$ dgmgrl sys/pwd@oltp
$ dgmgrl sys/test@dgprimary "show database 'prod'"

$ dgmgrl -logfile observer.log / "stop observer"
$ dgmgrl -silent sys/test@dgprimary "show configuration verbose"
$ dgmgrl  / "show configuration verbose"

=============
ADD - Adds a standby database to the broker configuration.
DGMGRL> ADD DATABASE db_name [AS CONNECT IDENTIFIER IS conn_identifier] [MAINTAINED AS {PHYSICAL|LOGICAL}];
DGMGRL> ADD DATABASE 'testdb' AS CONNECT IDENTIFIER IS testdb MAINTAINED AS PHYSICAL;
DGMGRL> ADD DATABASE 'logdb' AS CONNECT IDENTIFIER IS logdb MAINTAINED AS LOGICAL;
DGMGRL> ADD DATABASE 'devdb' AS CONNECT IDENTIFIER IS devdb.foo.com;

=============
CONNECT - Connects to an Oracle database instance.
DGMGRL> CONNECT username/password[@connect_identifier]
DGMGRL> CONNECT /
DGMGRL> CONNECT sys;
DGMGRL> CONNECT sys@test;
DGMGRL> CONNECT sys/pwd;
DGMGRL> CONNECT sys/pwd@dwh;
DGMGRL> CONNECT /@dwh;
$dgmgrl connect sys

=============
CONVERT - Converts a database from one type to another (from Oracle 11g).
DGMGRL> CONVERT DATABASE database_name TO {SNAPSHOT STANDBY|PHYSICAL STANDBY};
DGMGRL> CONVERT DATABASE 'devdb' to SNAPSHOT STANDBY;
DGMGRL> CONVERT DATABASE 'devdb' to PHYSICAL STANDBY;

=============
CREATE - Creates a broker configuration.
DGMGRL> CREATE CONFIGURATION config_name AS PRIMARY DATABASE IS db_name CONNECT IDENTIFIER IS conn_ident;
DGMGRL> CREATE CONFIGURATION 'dg' AS PRIMARY DATABASE IS 'prod' CONNECT IDENTIFIER IS prod.foo.com;
DGMGRL> CREATE CONFIGURATION 'dg_test' AS PRIMARY DATABASE IS 'test' CONNECT IDENTIFIER IS test;

=============
DISABLE - Disables a configuration, a database, or fast-start failover (FSFO).
DGMGRL> DISABLE CONFIGURATION;
DGMGRL> DISABLE CONFIGURATION;


DGMGRL> DISABLE DATABASE database_name;
DGMGRL> DISABLE DATABASE 'devdb';


DGMGRL> DISABLE FAST_START FAILOVER [FORCE | CONDITION condition];
DGMGRL> DISABLE FAST_START FAILOVER;
DGMGRL> DISABLE FAST_START FAILOVER FORCE;
DGMGRL> DISABLE FAST_START FAILOVER CONDITION '1578';

=============
EDIT - Edits a configuration, database, or instance.
DGMGRL> EDIT CONFIGURATION SET PROTECTION MODE AS {MaxProtection|MaxAvailability|MaxPerformance};
DGMGRL> EDIT CONFIGURATION SET PROTECTION MODE AS MAXPROTECTION;
DGMGRL> EDIT CONFIGURATION SET PROTECTION MODE AS MAXAVAILABILITY;
DGMGRL> EDIT CONFIGURATION SET PROTECTION MODE AS MAXPERFORMANCE;


DGMGRL> EDIT CONFIGURATION SET PROPERTY property_name = value;
DGMGRL> EDIT CONFIGURATION SET PROPERTY FastStartFailoverThreshold = 45;
DGMGRL> EDIT CONFIGURATION SET PROPERTY FastStartFailoverAutoReinstate = FALSE;
DGMGRL> EDIT CONFIGURATION SET PROPERTY FastStartFailoverAutoReinstate = TRUE;
DGMGRL> EDIT CONFIGURATION SET PROPERTY BYSTANDERSFOLLOWROLECHANGE= 'NONE';


DGMGRL> EDIT DATABASE database_name SET PROPERTY property_name = value;
DGMGRL> EDIT DATABASE devdb SET PROPERTY 'LogArchiveFormat'='log_%t_%s_%r_%d.arc';
DGMGRL> EDIT DATABASE prodb SET PROPERTY LogXptMode=SYNC;
DGMGRL> EDIT DATABASE prodb SET PROPERTY LogXptMode=ASYNC;
DGMGRL> EDIT DATABASE prodb SET PROPERTY LogXptMode=ARCH;
DGMGRL> EDIT DATABASE devdb SET PROPERTY LogShipping=OFF;
DGMGRL> EDIT DATABASE devdb SET PROPERTY LogShipping=ON;
DGMGRL> EDIT DATABASE prodb SET PROPERTY LogArchiveTrace=8;
DGMGRL> EDIT DATABASE prodb SET PROPERTY NetTimeout=60;
DGMGRL> EDIT DATABASE devdb SET PROPERTY 'ReopenSecs'=300;
DGMGRL> EDIT DATABASE prodb SET PROPERTY ArchiveLagTarget=1200;
DGMGRL> EDIT DATABASE prodb SET PROPERTY FastStartFailoverTarget='standby_name';
DGMGRL> EDIT DATABASE devdb SET PROPERTY 'StandbyArchiveLocation'='/oradata/archive/';
DGMGRL> EDIT DATABASE devdb SET PROPERTY 'DbFileNameConvert' = '/u01/od01/datafile/, /oradisk/od01/datafile/';
DGMGRL> EDIT DATABASE testdb SET PROPERTY DelayMins='720';
DGMGRL> EDIT DATABASE prodb SET PROPERTY RedoCompression ='ENABLE'
DGMGRL> EDIT DATABASE prodb SET PROPERTY RedoCompression ='DISABLE'
DGMGRL> EDIT DATABASE testdb SET PROPERTY LogArchiveMinSucceedDest =1


DGMGRL> EDIT DATABASE database_name RENAME TO new database_name;
DGMGRL> EDIT DATABASE 'devdbb' RENAME TO 'devdb';


DGMGRL> EDIT DATABASE database_name SET STATE = state [WITH APPLY INSTANCE = instance_name];
DGMGRL> EDIT DATABASE devdb SET STATE='READ-ONLY';
DGMGRL> EDIT DATABASE devdb SET STATE='OFFLINE';
DGMGRL> EDIT DATABASE devdb SET STATE='APPLY-OFF';
DGMGRL> EDIT DATABASE devdb SET STATE='APPLY-ON';
DGMGRL> EDIT DATABASE devdb SET STATE='TRANSPORT-OFF';
DGMGRL> EDIT DATABASE devdb SET STATE='TRANSPORT-ON';
DGMGRL> EDIT DATABASE prodb SET STATE='LOG-TRANSPORT-OFF';
DGMGRL> EDIT DATABASE devdb SET STATE='ONLINE' WITH APPLY INSTANCE=devdb2;


DGMGRL> EDIT INSTANCE instance_name [ON DATABASE database_name] SET AUTO PFILE [={init_file_path|OFF}];
DGMGRL> EDIT INSTANCE 'devdb1' ON DATABASE 'devdb' SET AUTO PFILE='initdevdb1.ora';

DGMGRL> EDIT INSTANCE instance_name [ON DATABASE database_name] SET PROPERTY property_name = value;
DGMGRL> EDIT INSTANCE * ON DATABASE database_name SET PROPERTY property_name = value;
DGMGRL> EDIT INSTANCE 'proddb' ON DATABASE 'proddb' SET PROPERTY 'StandbyArchiveLocation'='/oradata/arch/';

=============
ENABLE - Enables a configuration, a database, or fast-start failover (FSFO).
DGMGRL> ENABLE CONFIGURATION;
DGMGRL> ENABLE CONFIGURATION;


DGMGRL> ENABLE DATABASE database_name;
DGMGRL> ENABLE DATABASE 'devdb';


DGMGRL> ENABLE FAST_START FAILOVER [CONDITION condition];
DGMGRL> ENABLE FAST_START FAILOVER;
DGMGRL> ENABLE FAST_START FAILOVER CONDITION '1578';
DGMGRL> ENABLE FAST_START FAILOVER CONDITION "Stuck Archiver";
DGMGRL> ENABLE FAST_START FAILOVER CONDITION 'Corrupted Controlfile';
DGMGRL> ENABLE FAST_START FAILOVER CONDITION 'Corrupted Dictionary';
DGMGRL> ENABLE FAST_START FAILOVER CONDITION 'Inaccessible Logfile';

=============
EXIT - Exits the program.
DGMGRL> EXIT;

=============
FAILOVER - Changes a standby database to be the primary database.
DGMGRL> FAILOVER TO standby_database_name [IMMEDIATE]
DGMGRL> FAILOVER TO "testdb";
DGMGRL> FAILOVER TO "snapdb" IMMEDIATE;

=============
HELP - Displays description and syntax for a command.
DGMGRL> HELP [command];
DGMGRL> HELP REINSTATE
DGMGRL> HELP EDIT

=============
QUIT - Exits the program.
DGMGRL> QUIT;

=============
REINSTATE - Changes a database marked for reinstatement into a viable standby.
DGMGRL> REINSTATE DATABASE database_name;
DGMGRL> REINSTATE DATABASE prim1;

=============
REM - Comment to be ignored by DGMGRL.
DGMGRL> REM [comment];

=============
REMOVE - Removes a configuration, Oracle database, or instance.
DGMGRL> REMOVE CONFIGURATION [PRESERVE DESTINATIONS];
DGMGRL> REMOVE CONFIGURATION;
DGMGRL> REMOVE CONFIGURATION PRESERVE DESTINATIONS;


DGMGRL> REMOVE DATABASE database_name [PRESERVE DESTINATIONS];
DGMGRL> REMOVE DATABASE devdb;
DGMGRL> REMOVE DATABASE standby PRESERVE DESTINATIONS;


DGMGRL> REMOVE INSTANCE instance_name [ON DATABASE database_name];
DGMGRL> REMOVE INSTANCE inst1 ON DATABASE racdb;

=============
SHOW - Displays information about a configuration, database, instance or FSFO.
DGMGRL> SHOW CONFIGURATION [VERBOSE];
DGMGRL> SHOW CONFIGURATION;
DGMGRL> SHOW CONFIGURATION VERBOSE;


DGMGRL> SHOW DATABASE [VERBOSE] db_name [property_name];
DGMGRL> SHOW DATABASE 'devdb';
DGMGRL> SHOW DATABASE VERBOSE 'test';
DGMGRL> SHOW DATABASE 'dwhdb' 'StatusReport';
DGMGRL> SHOW DATABASE 'proddb' 'LogXptStatus';
DGMGRL> SHOW DATABASE 'proddb' 'InconsistentProperties';
DGMGRL> SHOW DATABASE 'proddb' 'InconsistentLogXptProps';
DGMGRL> SHOW DATABASE 'testdb' 'ArchiveLagTarget';
DGMGRL> SHOW DATABASE 'testdb' 'LogShipping';
DGMGRL> SHOW DATABASE 'testdb' 'PreferredApplyInstance';
DGMGRL> SHOW DATABASE 'proddb' 'StatusReport';
DGMGRL> SHOW DATABASE 'testdb' 'RecvQEntries';
DGMGRL> SHOW DATABASE 'proddb' 'SendQEntries';


DGMGRL> SHOW INSTANCE [VERBOSE] instance_name [property_name] [ON DATABASE db_name];
DGMGRL> SHOW INSTANCE inst1;
DGMGRL> SHOW INSTANCE VERBOSE inst3;
DGMGRL> SHOW INSTANCE testdb 'TopWaitEvents';


DGMGRL> SHOW FAST_START FAILOVER;
DGMGRL> SHOW FAST_START FAILOVER;

From 18c Oracle Database, SHOW ALL command shows the values of DGMGRL command line utility properties.
DGMGRL> SHOW ALL;
   debug ON
   echo OFF
   time OFF
   observerconfigfile = observer.ora

=============
SHUTDOWN - Shuts down a currently running Oracle instance.
DGMGRL> SHUTDOWN [NORMAL
 | IMMEDIATE | ABORT];
DGMGRL> SHUTDOWN;
DGMGRL> SHUTDOWN NORMAL;
DGMGRL> SHUT IMMEDIATE;
DGMGRL> SHUT ABORT;

=============
SQL - Executes a SQL statement
DGMGRL> SQL "sql_statement";


=============
START - Starts the fast-start failover(FSFO) observer.
DGMGRL> START OBSERVER [FILE=observer_configuration_file];
DGMGRL> START OBSERVER;

=============
STARTUP - Starts an Oracle database instance.
DGMGRL> STARTUP [RESTRICT] [FORCE] [PFILE=filespec]
[NOMOUNT  |  MOUNT | OPEN
 [READ ONLY|READ WRITE]];
DGMGRL> STARTUP;
DGMGRL> STARTUP NOMOUNT;
DGMGRL> STARTUP MOUNT;
DGMGRL> STARTUP OPEN;

DGMGRL> STARTUP FORCE;
DGMGRL> STARTUP FORCE RESTRICT NOMOUNT;
DGMGRL> STARTUP PFILE=initdwh.ora NOMOUNT;

=============
STOP - Stops the fast-start failover(FSFO) observer.
DGMGRL> STOP OBSERVER;

=============
SWITCHOVER - Switches roles between a primary and standby database.
DGMGRL> SWITCHOVER TO standby_database_name;
DGMGRL> SWITCHOVER TO "standby";

=============
VALIDATE - command to checks whether the database is ready for a role transition or not.

DGMGRL> VALIDATE DATABASE 'DB_NAME';    -- From Oracle Database 12c


From Oracle Database 18c,
DGMGRL> VALIDATE DATABASE standby-database-name SPFILE;

DGMGRL> VALIDATE NETWORK CONFIGURATION FOR { ALL | member name };
DGMGRL> VALIDATE NETWORK CONFIGURATION FOR stdby;

DGMGRL> VALIDATE STATIC CONNECT IDENTIFIER FOR { ALL | database name };
DGMGRL> VALIDATE STATIC CONNECT IDENTIFIER FOR stdby;


$BDUMP/drc*.log
$ORACLE_HOME/rdbms/log/drc*.log

alter system set dg_broker_start=false;
alter system set dg_broker_start=false sid='*';
alter system set dg_broker_start=FALSE SCOPE=spfile SID='*';
alter system set dg_broker_start=true;
alter system set dg_broker_start=true sid='*';
alter system set dg_broker_start=TRUE SCOPE=spfile SID='*';

alter system set dg_broker_config_file1='/u01/dg_broker_config_files/dr1TESTP.dat' sid='*';
alter system set dg_broker_config_file2='/u01/dg_broker_config_files/dr2TESTP.dat' sid='*';
set feedback off pages 0 long 900000 lines 20000 pagesize 20000 serveroutput on
accept USERNAME prompt “Enter username :”
–This line add a semicolon at the end of each statement
execute dbms_METADATA.SET_TRANSFORM_PARAM(DBMS_METADATA.SESSION_TRANSFORM,’SQLTERMINATOR’,true);
— This will generate the DDL for the user and add his objects,system and role grants
SELECT DBMS_METADATA.GET_DDL(‘USER’,username) as script from DBA_USERS where username=’&username’
UNION ALL
SELECT DBMS_METADATA.GET_GRANTED_DDL(‘SYSTEM_GRANT’,grantee)as script from DBA_SYS_PRIVS where grantee=’&username’ and rownum=1
UNION ALL
SELECT DBMS_METADATA.GET_GRANTED_DDL(‘ROLE_GRANT’,grantee)as script from DBA_ROLE_PRIVS where grantee=’&username’ and rownum=1
UNION ALL
SELECT DBMS_METADATA.GET_GRANTED_DDL(‘OBJECT_GRANT’,grantee)as script from DBA_TAB_PRIVS where grantee=’&username’ and rownum=1;
$ dgmgrl /
$ dgmgrl sys/pwd
$ dgmgrl sys/pwd@oltp
$ dgmgrl sys/test@dgprimary “show database ‘prod'”
$ dgmgrl -logfile observer.log / “stop observer”
$ dgmgrl -silent sys/test@dgprimary “show configuration verbose”
$ dgmgrl / “show configuration verbose”
ADD – Adds a standby database to the broker configuration.DGMGRL> ADD DATABASE db_name [AS CONNECT IDENTIFIER IS conn_identifier] [MAINTAINED AS {PHYSICAL|LOGICAL}];DGMGRL> ADD DATABASE ‘testdb’ AS CONNECT IDENTIFIER IS testdb MAINTAINED AS PHYSICAL;
DGMGRL> ADD DATABASE ‘logdb’ AS CONNECT IDENTIFIER IS logdb MAINTAINED AS LOGICAL;DGMGRL> ADD DATABASE ‘devdb’ AS CONNECT IDENTIFIER IS devdb.foo.com;
CONNECT – Connects to an Oracle database instance.DGMGRL> CONNECT username/password[@connect_identifier]DGMGRL> CONNECT /
DGMGRL> CONNECT sys;DGMGRL> CONNECT sys@test;DGMGRL> CONNECT sys/pwd;DGMGRL> CONNECT sys/pwd@dwh;
DGMGRL> CONNECT /@dwh;
$dgmgrl connect sys
CONVERT – Converts a database from one type to another (from Oracle 11g).DGMGRL> CONVERT DATABASE database_name TO {SNAPSHOT STANDBY|PHYSICAL STANDBY};DGMGRL> CONVERT DATABASE ‘devdb’ to SNAPSHOT STANDBY;DGMGRL> CONVERT DATABASE ‘devdb’ to PHYSICAL STANDBY;
CREATE – Creates a broker configuration.
DGMGRL> CREATE CONFIGURATION config_name AS PRIMARY DATABASE IS db_name CONNECT IDENTIFIER IS conn_ident;DGMGRL> CREATE CONFIGURATION ‘dg’ AS PRIMARY DATABASE IS ‘prod’ CONNECT IDENTIFIER IS prod.foo.com;DGMGRL> CREATE CONFIGURATION ‘dg_test’ AS PRIMARY DATABASE IS ‘test’ CONNECT IDENTIFIER IS test;
DISABLE – Disables a configuration, a database, or fast-start failover (FSFO).DGMGRL> DISABLE CONFIGURATION;DGMGRL> DISABLE CONFIGURATION;
DGMGRL> DISABLE DATABASE database_name;DGMGRL> DISABLE DATABASE ‘devdb’;
DGMGRL> DISABLE FAST_START FAILOVER [FORCE | CONDITION condition];DGMGRL> DISABLE FAST_START FAILOVER;DGMGRL> DISABLE FAST_START FAILOVER FORCE;
DGMGRL> DISABLE FAST_START FAILOVER CONDITION ‘1578’;
EDIT – Edits a configuration, database, or instance.DGMGRL> EDIT CONFIGURATION SET PROTECTION MODE AS {MaxProtection|MaxAvailability|MaxPerformance};DGMGRL> EDIT CONFIGURATION SET PROTECTION MODE AS MAXPROTECTION;DGMGRL> EDIT CONFIGURATION SET PROTECTION MODE AS MAXAVAILABILITY;DGMGRL> EDIT CONFIGURATION SET PROTECTION MODE AS MAXPERFORMANCE;
DGMGRL> EDIT CONFIGURATION SET PROPERTY property_name = value;DGMGRL> EDIT CONFIGURATION SET PROPERTY FastStartFailoverThreshold = 45;
DGMGRL> EDIT CONFIGURATION SET PROPERTY FastStartFailoverAutoReinstate = FALSE;
DGMGRL> EDIT CONFIGURATION SET PROPERTY FastStartFailoverAutoReinstate = TRUE;
DGMGRL> EDIT CONFIGURATION SET PROPERTY BYSTANDERSFOLLOWROLECHANGE= ‘NONE’;
DGMGRL> EDIT DATABASE database_name SET PROPERTY property_name = value;
DGMGRL> EDIT DATABASE devdb SET PROPERTY ‘LogArchiveFormat’=’log_%t_%s_%r_%d.arc’;
DGMGRL> EDIT DATABASE prodb SET PROPERTY LogXptMode=SYNC;DGMGRL> EDIT DATABASE prodb SET PROPERTY LogXptMode=ASYNC;
DGMGRL> EDIT DATABASE prodb SET PROPERTY LogXptMode=ARCH;
DGMGRL> EDIT DATABASE devdb SET PROPERTY LogShipping=OFF;
DGMGRL> EDIT DATABASE devdb SET PROPERTY LogShipping=ON;
DGMGRL> EDIT DATABASE prodb SET PROPERTY LogArchiveTrace=8;
DGMGRL> EDIT DATABASE prodb SET PROPERTY NetTimeout=60;
DGMGRL> EDIT DATABASE devdb SET PROPERTY ‘ReopenSecs’=300;
DGMGRL> EDIT DATABASE prodb SET PROPERTY ArchiveLagTarget=1200;
DGMGRL> EDIT DATABASE prodb SET PROPERTY FastStartFailoverTarget=’standby_name’;
DGMGRL> EDIT DATABASE devdb SET PROPERTY ‘StandbyArchiveLocation’=’/oradata/archive/’;
DGMGRL> EDIT DATABASE devdb SET PROPERTY ‘DbFileNameConvert’ = ‘/u01/od01/datafile/, /oradisk/od01/datafile/’;DGMGRL> EDIT DATABASE testdb SET PROPERTY DelayMins=’720′;
DGMGRL> EDIT DATABASE prodb SET PROPERTY RedoCompression =’ENABLE’
DGMGRL> EDIT DATABASE prodb SET PROPERTY RedoCompression =’DISABLE’
DGMGRL> EDIT DATABASE testdb SET PROPERTY LogArchiveMinSucceedDest =1
DGMGRL> EDIT DATABASE database_name RENAME TO new database_name;
DGMGRL> EDIT DATABASE ‘devdbb’ RENAME TO ‘devdb’;
DGMGRL> EDIT DATABASE database_name SET STATE = state [WITH APPLY INSTANCE = instance_name];DGMGRL> EDIT DATABASE devdb SET STATE=’READ-ONLY’;DGMGRL> EDIT DATABASE devdb SET STATE=’OFFLINE’;DGMGRL> EDIT DATABASE devdb SET STATE=’APPLY-OFF’;
DGMGRL> EDIT DATABASE devdb SET STATE=’APPLY-ON’;DGMGRL> EDIT DATABASE devdb SET STATE=’TRANSPORT-OFF’;DGMGRL> EDIT DATABASE devdb SET STATE=’TRANSPORT-ON’;DGMGRL> EDIT DATABASE prodb SET STATE=’LOG-TRANSPORT-OFF’;
DGMGRL> EDIT DATABASE devdb SET STATE=’ONLINE’ WITH APPLY INSTANCE=devdb2;
DGMGRL> EDIT INSTANCE instance_name [ON DATABASE database_name] SET AUTO PFILE [={init_file_path|OFF}];DGMGRL> EDIT INSTANCE ‘devdb1’ ON DATABASE ‘devdb’ SET AUTO PFILE=’initdevdb1.ora’;
DGMGRL> EDIT INSTANCE instance_name [ON DATABASE database_name] SET PROPERTY property_name = value;DGMGRL> EDIT INSTANCE * ON DATABASE database_name SET PROPERTY property_name = value;DGMGRL> EDIT INSTANCE ‘proddb’ ON DATABASE ‘proddb’ SET PROPERTY ‘StandbyArchiveLocation’=’/oradata/arch/’;
ENABLE – Enables a configuration, a database, or fast-start failover (FSFO).
DGMGRL> ENABLE CONFIGURATION;DGMGRL> ENABLE CONFIGURATION;
DGMGRL> ENABLE DATABASE database_name;DGMGRL> ENABLE DATABASE ‘devdb’;
DGMGRL> ENABLE FAST_START FAILOVER [CONDITION condition];DGMGRL> ENABLE FAST_START FAILOVER;DGMGRL> ENABLE FAST_START FAILOVER CONDITION ‘1578’;
DGMGRL> ENABLE FAST_START FAILOVER CONDITION “Stuck Archiver”;
DGMGRL> ENABLE FAST_START FAILOVER CONDITION ‘Corrupted Controlfile’;
DGMGRL> ENABLE FAST_START FAILOVER CONDITION ‘Corrupted Dictionary’;
DGMGRL> ENABLE FAST_START FAILOVER CONDITION ‘Inaccessible Logfile’;
EXIT – Exits the program.DGMGRL> EXIT;
FAILOVER – Changes a standby database to be the primary database.DGMGRL> FAILOVER TO standby_database_name [IMMEDIATE]DGMGRL> FAILOVER TO “testdb”;
DGMGRL> FAILOVER TO “snapdb” IMMEDIATE;
HELP – Displays description and syntax for a command.DGMGRL> HELP [command];DGMGRL> HELP REINSTATE
DGMGRL> HELP EDIT
QUIT – Exits the program.DGMGRL> QUIT;
REINSTATE – Changes a database marked for reinstatement into a viable standby.DGMGRL> REINSTATE DATABASE database_name;DGMGRL> REINSTATE DATABASE prim1;
REM – Comment to be ignored by DGMGRL.DGMGRL> REM [comment];
REMOVE – Removes a configuration, Oracle database, or instance.DGMGRL> REMOVE CONFIGURATION [PRESERVE DESTINATIONS];DGMGRL> REMOVE CONFIGURATION;
DGMGRL> REMOVE CONFIGURATION PRESERVE DESTINATIONS;
DGMGRL> REMOVE DATABASE database_name [PRESERVE DESTINATIONS];DGMGRL> REMOVE DATABASE devdb;
DGMGRL> REMOVE DATABASE standby PRESERVE DESTINATIONS;
DGMGRL> REMOVE INSTANCE instance_name [ON DATABASE database_name];DGMGRL> REMOVE INSTANCE inst1 ON DATABASE racdb;
SHOW – Displays information about a configuration, database, instance or FSFO.DGMGRL> SHOW CONFIGURATION [VERBOSE];
DGMGRL> SHOW CONFIGURATION;DGMGRL> SHOW CONFIGURATION VERBOSE;
DGMGRL> SHOW DATABASE [VERBOSE] db_name [property_name];
DGMGRL> SHOW DATABASE ‘devdb’;DGMGRL> SHOW DATABASE VERBOSE ‘test’;
DGMGRL> SHOW DATABASE ‘dwhdb’ ‘StatusReport’;DGMGRL> SHOW DATABASE ‘proddb’ ‘LogXptStatus’;DGMGRL> SHOW DATABASE ‘proddb’ ‘InconsistentProperties’;
DGMGRL> SHOW DATABASE ‘proddb’ ‘InconsistentLogXptProps’;
DGMGRL> SHOW DATABASE ‘testdb’ ‘ArchiveLagTarget’;
DGMGRL> SHOW DATABASE ‘testdb’ ‘LogShipping’;
DGMGRL> SHOW DATABASE ‘testdb’ ‘PreferredApplyInstance’;
DGMGRL> SHOW DATABASE ‘proddb’ ‘StatusReport’;
DGMGRL> SHOW DATABASE ‘testdb’ ‘RecvQEntries’;
DGMGRL> SHOW DATABASE ‘proddb’ ‘SendQEntries’;
DGMGRL> SHOW INSTANCE [VERBOSE] instance_name [property_name] [ON DATABASE db_name];
DGMGRL> SHOW INSTANCE inst1;DGMGRL> SHOW INSTANCE VERBOSE inst3;
DGMGRL> SHOW INSTANCE testdb ‘TopWaitEvents’;
DGMGRL> SHOW FAST_START FAILOVER;
DGMGRL> SHOW FAST_START FAILOVER;
From 18c Oracle Database, SHOW ALL command shows the values of DGMGRL command line utility properties.
DGMGRL> SHOW ALL;
debug ON
echo OFF
time OFF
observerconfigfile = observer.ora
SHUTDOWN – Shuts down a currently running Oracle instance.DGMGRL> SHUTDOWN [NORMAL | IMMEDIATE | ABORT];DGMGRL> SHUTDOWN;
DGMGRL> SHUTDOWN NORMAL;
DGMGRL> SHUT IMMEDIATE;
DGMGRL> SHUT ABORT;
SQL – Executes a SQL statement
DGMGRL> SQL “sql_statement”;
START – Starts the fast-start failover(FSFO) observer.DGMGRL> START OBSERVER [FILE=observer_configuration_file];DGMGRL> START OBSERVER;
STARTUP – Starts an Oracle database instance.DGMGRL> STARTUP [RESTRICT] [FORCE] [PFILE=filespec]
[NOMOUNT | MOUNT | OPEN [READ ONLY|READ WRITE]];DGMGRL> STARTUP;
DGMGRL> STARTUP NOMOUNT;
DGMGRL> STARTUP MOUNT;
DGMGRL> STARTUP OPEN;
DGMGRL> STARTUP FORCE;
DGMGRL> STARTUP FORCE RESTRICT NOMOUNT;
DGMGRL> STARTUP PFILE=initdwh.ora NOMOUNT;
STOP – Stops the fast-start failover(FSFO) observer.DGMGRL> STOP OBSERVER;
SWITCHOVER – Switches roles between a primary and standby database.DGMGRL> SWITCHOVER TO standby_database_name;DGMGRL> SWITCHOVER TO “standby”;
VALIDATE – command to checks whether the database is ready for a role transition or not.
DGMGRL> VALIDATE DATABASE …; — From Oracle Database 12c
From Oracle Database 18c,
DGMGRL> VALIDATE DATABASE standby-database-name SPFILE;
DGMGRL> VALIDATE NETWORK CONFIGURATION FOR { ALL | member name };
DGMGRL> VALIDATE NETWORK CONFIGURATION FOR stdby;
DGMGRL> VALIDATE STATIC CONNECT IDENTIFIER FOR { ALL | database name };DGMGRL> VALIDATE STATIC CONNECT IDENTIFIER FOR stdby;
$BDUMP/drc*.log
$ORACLE_HOME/rdbms/log/drc*.log
alter system set dg_broker_start=false;
alter system set dg_broker_start=false sid=’*’;
alter system set dg_broker_start=FALSE SCOPE=spfile SID=’*’;
alter system set dg_broker_start=true;
alter system set dg_broker_start=true sid=’*’;
alter system set dg_broker_start=TRUE SCOPE=spfile SID=’*’;
alter system set dg_broker_config_file1=’/u01/dg_broker_config_files/dr1TESTP.dat’ sid=’*’;
alter system set dg_broker_config_file2=’/u01/dg_broker_config_files/dr2TESTP.dat’ sid=’*’;
Here are asmcmd commands in a nutshell.
This section describes the ASMCMD disk group management commands.
Table 12-27 provides a summary of the disk group management commands.
Table 12-27 Summary of ASMCMD Disk group management commands
| Command | Description |
|---|---|
| chdg | Changes a disk group (add, drop, or rebalance). |
| chkdg | Checks or repairs a disk group. |
| dropdg | Drops a disk group. |
| iostat | Displays I/O statistics for disks. |
| lsattr | Lists the attributes of a disk group. |
| lsdg | Lists disk groups and their information. |
| lsdsk | Lists disks Oracle ASM disks. |
| lsod | Lists open devices. |
| md_backup | Creates a backup of the metadata of mounted disk groups. |
| md_restore | Restores disk groups from a backup of the metadata. |
| mkdg | Creates a disk group. |
| mount | Mounts a disk group. |
| offline | Offlines a disk or a failure group. |
| online | Onlines a disk or a failure group. |
| rebal | Rebalances a disk group. |
| remap | Relocates data in a range of physical blocks on a disk. |
| setattr | Sets attributes in a disk group. |
| umount | Dismounts a disk group. |
Purpose
Changes a disk group (adds disks, drops disks, resizes disks, or rebalances a disk group) based on an XML configuration file.
Syntax and Descriptionchdg { config_file.xml | 'contents_of_xml_file' }
Table 12-28 lists the syntax options for the chdg command.
Table 12-28 Options for the chdg command
| Option | Description |
|---|---|
config_file | Name of the XML file that contains the changes for the disk group. chdg searches for the XML file in the directory where ASMCMD was started unless a path is specified.For examples of the valid tags and XML configuration file, see Example 12-30 and Example 12-31. |
contents_of_xml_file | The XML script enclosed in single quotations. |
chdg modifies a disk group based on an XML configuration file. The modification includes adding or deleting disks from an existing disk group, and the setting rebalance power level. The power level can be set to the same values as the ASM_POWER_LIMIT initialization parameter. For information about the initialization parameter, see “ASM_POWER_LIMIT”.
When adding disks to a disk group, the diskstring must be specified in a format similar to the ASM_DISKSTRING initialization parameter. For information about the initialization parameter, see “ASM_DISKSTRING”.
The failure groups are optional parameters. The default causes every disk to belong to a its own failure group. For information about failure groups, see“Oracle ASM Failure Groups”.
Dropping disks from a disk group can be performed through this operation. An individual disk can be referenced by its Oracle ASM disk name. A set of disks that belong to a failure group can be specified by the failure group name. For information about dropping disks, see“Dropping Disks from Disk Groups”.
You can resize a disk inside a disk group with chdg. The resize operation fails if there is not enough space for storing data after the resize. For information about resizing disks, see“Resizing Disks in Disk Groups”.
Example 12-30 shows the basic structure and the valid tags with their respective attributes for the chdg XML configuration file.
Example 12-30 Tags for the chdg XML configuration template
<chdg> update disk clause (add/delete disks/failure groups)
      name         disk group to change
      power        power to perform rebalance

<add>  items to add are placed here
</add>

<drop> items to drop are placed here
</drop>

<fg>  failure group
      name         failure group name
</fg>

<dsk> disk
      name         disk name
      string       disk path
      size         size of the disk to add
      force        true specifies to use the force option
</dsk>

</chdg>
For information about creating a disk group with ASMCMD mkdg, see “mkdg”. For information about altering disk groups, see “Altering Disk Groups”.
Example
The following is an example of an XML configuration file for chdg. This XML file alters the disk group named data. The failure group fg1 is dropped and the disk data_0001 is also dropped. The /dev/disk5 disk is added to failure group fg2. The rebalance power level is set to 3.
Example 12-31 chdg sample XML configuration file
<chdg name="data" power="3">
  <drop>
    <fg name="fg1"></fg>
    <dsk name="data_0001"/>
  </drop>
  <add>
    <fg name="fg2">
      <dsk string="/dev/disk5"/>
    </fg>
  </add>
</chdg>
The following are examples of the chdg command with the configuration file or configuration information on the command line.
Example 12-32 Using the ASMCMD chdg command
ASMCMD [+] > chdg data_config.xml

ASMCMD [+] > chdg '<chdg name="data" power="3">
        <drop><fg name="fg1"></fg><dsk name="data_0001"/></drop>
        <add><fg name="fg2"><dsk string="/dev/disk5"/></fg></add></chdg>'
Purpose
Checks or repairs the metadata of a disk group.
Syntax and Descriptionchkdg [--repair] diskgroup
Table 12-29 lists the syntax options for the chkdg command.
Table 12-29 Options for the chkdg command
| Option | Description |
|---|---|
--repair | Repairs the disk group. |
diskgroup | Name of disk group to check or repair. |
chkdg checks the metadata of a disk group for errors and optionally repairs the errors.
Example
The following is an example of the chkdg command used to check and repair the data disk group.
Example 12-33 Using the ASMCMD chkdg command
ASMCMD [+] > chkdg --repair data
Purpose
Drops a disk group.
Syntax and Descriptiondropdg [-r-f] [-r] diskgroup
Table 12-30 lists the syntax options for the dropdg command.
Table 12-30 Options for the dropdg command
| Option | Description |
|---|---|
-f | Force the operation. Only applicable if the disk group cannot be mounted. |
-r | Recursive, include contents. |
diskgroup | Name of disk group to drop. |
dropdg drops an existing disk group. The disk group should not be mounted on multiple nodes.
Example
These are examples of the use of dropdg. The first example forces the drop of the disk group data, including any data in the disk group. The second example drops the disk group fra, including any data in the disk group.
Example 12-34 Using the ASMCMD dropdg command
ASMCMD [+] > dropdg -r -f data

ASMCMD [+] > dropdg -r fra
Purpose
Displays I/O statistics for Oracle ASM disks in mounted disk groups.
Syntax and Descriptioniostat [--suppressheader] [-et] [--io] [--region]
[-Gdiskgroup] [interval]
iostat lists disk group statistics using the V$ASM_DISK_IOSTAT view.
Table 12-31 lists the syntax options for the iostat command.
Table 12-31 Options for the iostat command
| Option | Description |
|---|---|
-e | Displays error statistics (Read_Err, Write_Err). |
-G diskgroup | Displays statistics for the disk group name. |
--suppressheader | Suppresses column headings. |
--io | Displays information in number of I/Os, instead of bytes. |
-t | Displays time statistics (Read_Time, Write_Time). |
--region | Displays information for cold and hot disk regions (Cold_Reads, Cold_Writes, Hot_Reads, Hot_Writes). |
interval | Refreshes the statistics display based on the interval value (seconds). Use Ctrl-C to stop the interval display. |
Table 12-32 shows the statistics for a disk group. To view the complete set of statistics for a disk group, use the V$ASM_DISK_IOSTAT view.
Table 12-32 Attribute descriptions for iostat command output
| Attribute Name | Description |
|---|---|
| Group_Name | Name of the disk group. |
| Dsk_Name | Name of the disk. |
| Reads | Number of bytes read from the disk. If the --io option is entered, then the value is displayed as number of I/Os. |
| Writes | Number of bytes written to the disk. If the --io option is entered, then the value is displayed as number of I/Os. |
| Cold_Reads | Number of bytes read from the cold disk region. If the --io option is entered, then the value is displayed as number of I/Os. |
| Cold_Writes | Number of bytes written from the cold disk region. If the --io option is entered, then the value is displayed as number of I/Os. |
| Hot_Reads | Number of bytes read from the hot disk region. If the --io option is entered, then the value is displayed as number of I/Os. |
| Hot_Writes | Number of bytes written to the hot disk region. If the --io option is entered, then the value is displayed as number of I/Os. |
| Read_Err | Number of failed I/O read requests for the disk. |
| Write_Err | Number of failed I/O write requests for the disk. |
| Read_Time | I/O time (in hundredths of a second) for read requests for the disk if the TIMED_STATISTICS initialization parameter is set to TRUE (0 if set to FALSE). |
| Write_Time | I/O time (in hundredths of a second) for write requests for the disk if the TIMED_STATISTICS initialization parameter is set to TRUE (0 if set to FALSE). |
If a refresh interval is not specified, the number displayed represents the total number of bytes or I/Os. If a refresh interval is specified, then the value displayed (bytes or I/Os) is the difference between the previous and current values, not the total value.
Example
The following are examples of the iostat command. The first example displays disk I/O statistics for the data disk group in total number of bytes. The second example displays disk I/O statistics for the data disk group in total number of I/O operations.
Example 12-35 Using the ASMCMD iostat command
ASMCMD [+] > iostat -G data
Group_Name  Dsk_Name   Reads       Writes
DATA        DATA_0000  180488192   473707520
DATA        DATA_0001  1089585152  469538816
DATA        DATA_0002  191648256   489570304
DATA        DATA_0003  175724032   424845824
DATA        DATA_0004  183421952   781429248
DATA        DATA_0005  1102540800  855269888
DATA        DATA_0006  171290624   447662592
DATA        DATA_0007  172281856   361337344
DATA        DATA_0008  173225472   390840320
DATA        DATA_0009  288497152   838680576
DATA        DATA_0010  196657152   375764480
DATA        DATA_0011  436420096   356003840

ASMCMD [+] > iostat --io -G data
Group_Name  Dsk_Name   Reads  Writes
DATA        DATA_0000  2801   34918
DATA        DATA_0001  58301  35700
DATA        DATA_0002  3320   36345
DATA        DATA_0003  2816   10629
DATA        DATA_0004  2883   34850
DATA        DATA_0005  59306  38097
DATA        DATA_0006  2151   10129
DATA        DATA_0007  2686   10376
DATA        DATA_0008  2105   8955
DATA        DATA_0009  9121   36713
DATA        DATA_0010  3557   8596
DATA        DATA_0011  17458  9269
Purpose
Lists the attributes of a disk group.
Syntax and Descriptionlsattr [--suppressheader][-Gdiskgroup ] [-lm] [pattern]
Table 12-33 lists the syntax options for the lsattr command.
Table 12-33 Options for the lsattr command
| Option | Description |
|---|---|
-G diskgroup | Disk group name. |
--suppressheader | Suppresses column headings. |
-l | Display names with values. |
-m | Displays additional information, such as the RO and Sys columns. |
pattern | Display the attributes that contain pattern expression. |
Information about disk group attributes is retrieved from the V$ASM_ATTRIBUTE view. For information about disk group attributes, see “Disk Group Attributes”.
The RO (read-only) column identifies those attributes that can only be set when a disk group is created. The Sys column identifies those attributes that are system-created.
To display information about the disk group template attributes, see “lstmpl”.
To set disk group attributes, see “setattr”.
Example
The following are examples of the lsattr command. The first displays information about all attributes for the data disk group. The second example displays only those attributes with names containing the string compat for the fra disk group. Note the use of both the % and * wildcard characters on Linux.
Example 12-36 Using the ASMCMD lsattr command
ASMCMD [+] > lsattr -G data -l
Name                     Value
access_control.enabled   FALSE
access_control.umask     066
au_size                  1048576
cell.smart_scan_capable  FALSE
compatible.advm          11.2.0.0.0
compatible.asm           11.2.0.0.0
compatible.rdbms         11.2.0.0.0
disk_repair_time         3.6h
sector_size              512

ASMCMD [+] > lsattr -G fra -l %compat*
Name              Value
compatible.asm    11.2.0.0.0
compatible.rdbms  10.1.0.0.0
Purpose
Lists mounted disk groups and their information. lsdg queries V$ASM_DISKGROUP_STAT by default. If the --discovery flag is specified, the V$ASM_DISKGROUP is queried instead. The output also includes notification of any current rebalance operation for a disk group. If a disk group is specified, then lsdg returns only information about that disk group.
Syntax and Description
lsdg [--suppressheader] [-g] [--discovery] [pattern]
Table 12-34 lists the options for the lsdg command.
Table 12-34 Options for the lsdg command
| Option | Description |
|---|---|
| (none) | Displays the disk group attributes listed in Table 12-35. |
--discovery | Selects from V$ASM_DISKGROUP, or from GV$ASM_DISKGROUP if the -g flag is also specified. This option is always enabled if the Oracle ASM instance is version 10.1 or earlier. This flag is disregarded if lsdg is running in non-connected mode. |
-g | Selects from GV$ASM_DISKGROUP_STAT, or from GV$ASM_DISKGROUP if the --discovery flag is also specified. GV$ASM_DISKGROUP.INST_ID is included in the output. The REBAL column of the GV$ASM_OPERATION view is also included in the output. |
--suppressheader | Suppresses column headings. |
pattern | Returns only information about the specified disk group or disk groups that match the supplied pattern. See “Wildcard Characters”. |
Table 12-35 shows the attributes for each disk group. To view the complete set of attributes for a disk group, use the V$ASM_DISKGROUP_STAT or V$ASM_DISKGROUP view.
See Also:Oracle Database Reference for descriptions of disk group information displayed in the V$ASM_DISKGROUP view
Table 12-35 Attribute descriptions for lsdg command output
| Attribute Name | Description |
|---|---|
| State | State of the disk group. Values include BROKEN, CONNECTED, DISMOUNTED, MOUNTED, QUIESCING, and UNKNOWN. |
| Type | Disk group redundancy (NORMAL, HIGH, EXTERNAL). |
| Rebal | Y if a rebalance operation is in progress. |
| Sector | Sector size in bytes. |
| Block | Block size in bytes. |
| AU | Allocation unit size in bytes. |
| Total_MB | Size of the disk group in megabytes. |
| Free_MB | Free space in the disk group in megabytes, without regard to redundancy. From the V$ASM_DISKGROUP view. |
| Req_mir_free_MB | Amount of space that must be available in the disk group to restore full redundancy after the most severe failure that can be tolerated by the disk group. This is the REQUIRED_MIRROR_FREE_MB column from the V$ASM_DISKGROUP view. |
| Usable_file_MB | Amount of free space, adjusted for mirroring, that is available for new files. From the V$ASM_DISKGROUP view. |
| Offline_disks | Number of offline disks in the disk group. Offline disks are eventually dropped. |
| Voting_files | Specifies whether the disk group contains voting files (Y or N). |
| Name | Disk group name. |
Example
The following example lists the attributes of the data disk group.
Example 12-37 Using the ASMCMD lsdg command
ASMCMD [+] > lsdg data
State    Type    Rebal  Sector  Block       AU  Total_MB  Free_MB  Req_mir_free_MB  Usable_file_MB
MOUNTED  NORMAL  N         512   4096  4194304     12288     8835             1117            3859

(continued)
Offline_disks  Voting_files  Name
            0             N  DATA
Purpose
Lists Oracle ASM disks.
Syntax and Descriptionlsdsk [--suppressheader] [-kptgMI] [-Gdiskgroup ]
[ --member|--candidate]
[--discovery][--statistics][pattern]
Table 12-36 lists the options for the lsdsk command.
Table 12-36 Options for the lsdsk command
| Option | Description |
|---|---|
| (none) | Displays the PATH column of the V$ASM_DISK_STAT view. |
-k | Displays the TOTAL_MB, FREE_MB, OS_MB,NAME, FAILGROUP, LIBRARY, LABEL, UDID, PRODUCT, REDUNDANCY, and PATH columns of the V$ASM_DISK view. |
--statistics | Displays the READS, WRITES, READ_ERRS, WRITE_ERRS, READ_TIME, WRITE_TIME, BYTES_READ, BYTES_WRITTEN, and the PATH columns of the V$ASM_DISK view. |
-p | Displays the GROUP_NUMBER, DISK_NUMBER, INCARNATION, MOUNT_STATUS, HEADER_STATUS, MODE_STATUS, STATE, and the PATH columns of the V$ASM_DISK view. |
-t | Displays the CREATE_DATE, MOUNT_DATE, REPAIR_TIMER, and the PATH columns of the V$ASM_DISK view. |
-g | Selects from GV$ASM_DISK_STAT, or from GV$ASM_DISK if the --discovery flag is also specified. GV$ASM_DISK.INST_ID is included in the output. |
--discovery | Selects from V$ASM_DISK, or from GV$ASM_DISK if the -g flag is also specified. This option is always enabled if the Oracle ASM instance is version 10.1 or earlier. This flag is disregarded if lsdsk is running in non-connected mode. |
--suppressheader | Suppresses column headings. |
-I | Scans disk headers for information rather than extracting the information from an Oracle ASM instance. This option forces non-connected mode. |
-G | Restricts results to only those disks that belong to the group specified by diskgroup. |
-M | Displays the disks that are visible to some but not all active instances. These are disks that, if included in a disk group, cause the mount of that disk group to fail on the instances where the disks are not visible. |
--candidate | Restricts results to only disks having membership status equal to CANDIDATE. |
--member | Restricts results to only disks having membership status equal to MEMBER. |
pattern | Returns only information about the specified disks that match the supplied pattern. |
The lsdsk command can run in connected or non-connected mode. The connected mode is always attempted first. The -I option forces non-connected mode.
lsdsk uses the V$ASM_DISK_STAT and V$ASM_DISK dynamic views to retrieve disk information. The V$ASM_DISK_STAT view is used by default.lsdsk scans disk headers to retrieve disk information. Some information is not available in this mode and some options are not valid combinations with this mode.Note:The non-connected mode is not supported on Windows.
pattern restricts the output to only disks that match the pattern specified. Wild-card characters and slashes (/ or \) can be part of the pattern. pattern should be specified as the last option for the command. For information about wildcards, see “Wildcard Characters”.
The -k, -p, -t, and --statistics options modify how much information is displayed for each disk. If any combination of the options are specified, then the output shows the union of the attributes associated with each flag.
Example
The following are examples of the lsdsk command. The first and second examples list information about disks in the data disk group. The third example lists information about candidate disks.
Example 12-38 Using the ASMCMD lsdsk command
ASMCMD [+] > lsdsk -t -G data
Create_Date  Mount_Date  Repair_Timer  Path
13-JUL-09    13-JUL-09   0             /devices/diska1
13-JUL-09    13-JUL-09   0             /devices/diska2
13-JUL-09    13-JUL-09   0             /devices/diska3
13-JUL-09    13-JUL-09   0             /devices/diskb1
13-JUL-09    13-JUL-09   0             /devices/diskb2
13-JUL-09    13-JUL-09   0             /devices/diskb3
13-JUL-09    13-JUL-09   0             /devices/diskc1
13-JUL-09    13-JUL-09   0             /devices/diskc2
...

ASMCMD [+] > lsdsk -p -G data /devices/diska*
Group_Num  Disk_Num      Incarn  Mount_Stat  Header_Stat  Mode_Stat  State   Path
        1         0  2105454210  CACHED      MEMBER       ONLINE     NORMAL  /devices/diska1
        1         1  2105454199  CACHED      MEMBER       ONLINE     NORMAL  /devices/diska2
        1         2  2105454205  CACHED      MEMBER       ONLINE     NORMAL  /devices/diska3

ASMCMD [+] > lsdsk --candidate -p
Group_Num  Disk_Num      Incarn  Mount_Stat  Header_Stat  Mode_Stat  State   Path
        0         5  2105454171  CLOSED      CANDIDATE    ONLINE     NORMAL  /devices/diske1
        0        25  2105454191  CLOSED      CANDIDATE    ONLINE     NORMAL  /devices/diske2
        0        18  2105454184  CLOSED      CANDIDATE    ONLINE     NORMAL  /devices/diske3
        0        31  2105454197  CLOSED      CANDIDATE    ONLINE     NORMAL  /devices/diskk1
        0        21  2105454187  CLOSED      CANDIDATE    ONLINE     NORMAL  /devices/diskk2
        0        26  2105454192  CLOSED      CANDIDATE    ONLINE     NORMAL  /devices/diskk3
        0        14  2105454180  CLOSED      CANDIDATE    ONLINE     NORMAL  /devices/diskl1
...
Purpose
Lists the open Oracle ASM disks.
Syntax and Descriptionlsod [--suppressheader] [-Gdiskgroup] [--processprocess] [pattern]
Table 12-37 lists the syntax options for the lsod command.
Table 12-37 Options for the lsod command
| Option | Description |
|---|---|
--suppressheader | Suppresses column header information from the output. |
-G diskgroup | Specifies the disk group that contains the open disks. |
--process process | Specifies a pattern to filter the list of processes. |
pattern | Specifies a pattern to filter the list of disks. |
The rebalance operation (RBAL) opens a disk both globally and locally so the same disk may be listed twice in the output for the RBAL process.
Example
The following are examples of the lsod command. The first example lists the open devices associated with the data disk group and the LGWR process. The second example lists the open devices associated with the LGWR process for disks that match the diska pattern.
Example 12-39 Using the ASMCMD lsod command
ASMCMD [+] > lsod -G data --process *LGWR*
Instance Process                  OSPID Path
1        oracle@dadvmn0652 (LGWR) 26593 /devices/diska1
1        oracle@dadvmn0652 (LGWR) 26593 /devices/diska2
1        oracle@dadvmn0652 (LGWR) 26593 /devices/diska3
1        oracle@dadvmn0652 (LGWR) 26593 /devices/diskb1
1        oracle@dadvmn0652 (LGWR) 26593 /devices/diskb2
1        oracle@dadvmn0652 (LGWR) 26593 /devices/diskb3
1        oracle@dadvmn0652 (LGWR) 26593 /devices/diskd1

ASMCMD [+] > lsod --process *LGWR* *diska*
Instance Process                  OSPID Path
1        oracle@dadvmn0652 (LGWR) 26593 /devices/diska1
1        oracle@dadvmn0652 (LGWR) 26593 /devices/diska2
1        oracle@dadvmn0652 (LGWR) 26593 /devices/diska3
For another example of the lsod command, see Example 12-2.
Purpose
The md_backup command creates a backup file containing metadata for one or more disk groups.
Syntax and Descriptionmd_backupbackup_file [-G'diskgroup [,diskgroup,...]']
Table 12-38 describes the options for the md_backup command.
Table 12-38 Options for the md_backup command
| Option | Description |
|---|---|
backup_file | Specifies the backup file in which you want to store the metadata. |
-G diskgroup | Specifies the disk group name of the disk group that must be backed up |
By default all the mounted disk groups are included in the backup file, which is saved in the current working directory if a path is not specified with the file name.
Oracle Automatic Storage Management Cluster File System (Oracle ACFS) volume and file system information is not backed up.
Example
The first example shows the use of the backup command when run without the disk group option. This example backs up all the mounted disk groups and creates the backup image in the /scratch/backup/alldgs20100422 file. The second example creates a backup of the data disk group. The metadata backup that this example creates is saved in the /scratch/backup/data20100422 file.
Example 12-40 Using the ASMCMD md_backup command
ASMCMD [+] > md_backup /scratch/backup/alldgs20100422
Disk group metadata to be backed up: DATA
Disk group metadata to be backed up: FRA
Current alias directory path: ORCL/ONLINELOG
Current alias directory path: ORCL/PARAMETERFILE
Current alias directory path: ORCL
Current alias directory path: ASM
Current alias directory path: ORCL/DATAFILE
Current alias directory path: ORCL/CONTROLFILE
Current alias directory path: ASM/ASMPARAMETERFILE
Current alias directory path: ORCL/TEMPFILE
Current alias directory path: ORCL/ARCHIVELOG/2010_04_20
Current alias directory path: ORCL
Current alias directory path: ORCL/BACKUPSET/2010_04_21
Current alias directory path: ORCL/ARCHIVELOG/2010_04_19
Current alias directory path: ORCL/BACKUPSET/2010_04_22
Current alias directory path: ORCL/ONLINELOG
Current alias directory path: ORCL/BACKUPSET/2010_04_20
Current alias directory path: ORCL/ARCHIVELOG
Current alias directory path: ORCL/BACKUPSET
Current alias directory path: ORCL/ARCHIVELOG/2010_04_22
Current alias directory path: ORCL/DATAFILE
Current alias directory path: ORCL/CONTROLFILE
Current alias directory path: ORCL/ARCHIVELOG/2010_04_21

ASMCMD [+] > md_backup /scratch/backup/data20100422 -G data
Disk group metadata to be backed up: DATA
Current alias directory path: ORCL/ONLINELOG
Current alias directory path: ASM
Current alias directory path: ORCL/CONTROLFILE
Current alias directory path: ASM/ASMPARAMETERFILE
Current alias directory path: ORCL/PARAMETERFILE
Current alias directory path: ORCL
Current alias directory path: ORCL/DATAFILE
Current alias directory path: ORCL/TEMPFILE
Purpose
The md_restore command restores disk groups from a metadata backup file.
Syntax and Descriptionmd_restorebackup_file[--silent] [--full|--nodg|--newdg-o'old_diskgroup:new_diskgroup [,…]’][-Ssql_script_file] [-G'diskgroup [,diskgroup…]']
Table 12-39 describes the options for the md_restore command.
Table 12-39 Options for the md_restore command
| Option | Description |
|---|---|
backup_file | Reads the metadata information from backup_file. |
--silent | Ignore errors. Typically, if md_restore encounters an error, it stops. Specifying this flag ignores any errors. |
--full | Specifies to create a disk group and restore metadata. |
--nodg | Specifies to restore metadata only. |
--newdg -o old_diskgroup:new_diskgroup] | Specifies to create a disk group with a different name when restoring metadata. The -o option is required with --newdg. |
-S sql_script_file | Write SQL commands to the specified SQL script file instead of executing the commands. |
-G diskgroup | Select the disk groups to be restored. If no disk groups are defined, then all disk groups are restored. |
Example
The first example restores the disk group data from the backup script and creates a copy. The second example takes an existing disk group data and restores its metadata. The third example restores disk group data completely but the new disk group that is created is named data2. The fourth example restores from the backup file after applying the overrides defined in the override.sql script file.
Example 12-41 Using the ASMCMD md_restore command
ASMCMD [+] > md_restore –-full –G data –-silent /scratch/backup/alldgs20100422

ASMCMD [+] > md_restore –-nodg –G data –-silent /scratch/backup/alldgs20100422

ASMCMD [+] > md_restore –-newdg -o 'data:data2' --silent /scratch/backup/data20100422

ASMCMD [+] > md_restore -S override.sql --silent /scratch/backup/data20100422
Purpose
Creates a disk group based on an XML configuration file.
Syntax and Descriptionmkdg { config_file.xml | 'contents_of_xml_file' }
Table 12-40 lists the syntax options for the mkdg command.
Table 12-40 Options for the mkdg command
| Option | Description |
|---|---|
config_file | Name of the XML file that contains the configuration for the new disk group. mkdg searches for the XML file in the directory where ASMCMD was started unless a path is specified.For examples of the valid tags and XML configuration file, see Example 12-42 and Example 12-43. |
contents_of_xml_file | The XML script enclosed in single quotations. |
mkdg creates a new disk group with an XML configuration file that specifies the name of the disk group, redundancy, attributes, and paths of the disks that form the disk group. Redundancy is an optional parameter; the default is normal redundancy. For some types of redundancy, disks are required to be gathered into failure groups. In the case that failure groups are not specified for a disk group, each disk in the disk group belongs to its own failure group.
Note that mkdg only mounts a disk group on the local node.
It is possible to set some disk group attribute values during disk group creation. Some attributes, such as AU_SIZE and SECTOR_SIZE, can be set only during disk group creation. For more information about disk groups attributes, refer to “Disk Group Attributes”.
The default disk group compatibility settings are 10.1 for Oracle ASM compatibility, 10.1 for database compatibility, and no value for Oracle ADVM compatibility. For information about disk group compatibility attributes, see “Disk Group Compatibility”.
Example 12-42 shows the basic structure and the valid tags with their respective attributes for the mkdg XML configuration file.
Example 12-42 Tags for mkdg XML configuration file
<dg>  disk group
      name         disk group name
      redundancy   normal, external, high

<fg>  failure group
      name         failure group name
</fg>

<dsk> disk
      name         disk name
      string       disk path
      size         size of the disk to add
      force        true specifies to use the force option
</dsk>

<a>   attribute
      name         attribute name
      value        attribute value
</a>

</dg>
For information about altering a disk group with ASMCMD chdg, see “chdg”. For information about creating a disk group, see “Creating Disk Groups”.
Example
The following is an example of an XML configuration file for mkdg. The configuration file creates a disk group named data with normal redundancy. Two failure groups, fg1 and fg2, are created, each with two disks identified by associated disk strings. The disk group compatibility attributes are all set to 11.2.
Example 12-43 mkdg sample XML configuration file
<dg name="data" redundancy="normal">
  <fg name="fg1">
    <dsk string="/dev/disk1"/>
    <dsk string="/dev/disk2"/>
  </fg>
  <fg name="fg2">
    <dsk string="/dev/disk3"/>
    <dsk string="/dev/disk4"/>
  </fg>
  <a name="compatible.asm" value="11.2"/>
  <a name="compatible.rdbms" value="11.2"/>
  <a name="compatible.advm" value="11.2"/>
</dg>
The following are examples of the mkdg command. The first example runs mkdg with an XML configuration file in the directory where ASMCMD was started. The second example runs mkdg using information on the command line.
Example 12-44 Using the ASMCMD mkdg command
ASMCMD [+] > mkdg data_config.xml

ASMCMD [+] > mkdg '<dg name="data"><dsk string="/dev/disk*"/></dg>'
Purpose
Mounts a disk group.
Syntax and Descriptionmount [--restrict] { [-a] | [-f] diskgroup[ diskgroup …] }
Table 12-41 lists the syntax options for the mount command.
Table 12-41 Options for the mount command
| Option | Description |
|---|---|
diskgroup | Name of the disk group. |
-a | Mounts all disk groups. |
--restrict | Mounts in restricted mode. |
-f | Forces the mount operation. |
This operation mounts one or more disk groups. A disk group can be mounted with or without force or restricted options. For more information about mounting disk groups, see “Mounting and Dismounting Disk Groups”.
Example
The following are examples of the mount command showing the use of the force, restrict, and all options.
Example 12-45 Using the ASMCMD mount command
ASMCMD [+] > mount -f data

ASMCMD [+] > mount --restrict data

ASMCMD [+] > mount -a
Purpose
Offline disks or failure groups that belong to a disk group.
Syntax and Descriptionoffline-Gdiskgroup
{ -Ffailgroup |-Ddisk}
[-t {minutes | hours}]
Table 12-42 lists the syntax options for the offline command.
Table 12-42 Options for the offline command
| Option | Description |
|---|---|
-G diskgroup | Disk group name. |
-F failgroup | Failure group name. |
-D disk | Specifies a single disk name. |
-t minutes | hours | Specifies the time before the specified disk is dropped as nm or nh, where m specifies minutes and h specifies hours. For example, 120m or 2h.The default unit is hours. |
When a failure group is specified, this implies all the disks that belong to it should be offlined.
Example
The following are examples of the offline command. The first example offlines the failgroup1 failure group of the data disk group. The second example offlines the data_0001 disk of the data disk group with a time of 1.5 hours before the disk is dropped.
Example 12-46 Using the ASMCMD offline command
ASMCMD [+] > offline -G data -F failgroup1

ASMCMD [+] > offline -G data -D data_0001 -t 1.5h
Purpose
Online all disks, a single disk, or a failure group that belongs to a disk group.
Syntax and Descriptiononline-Gdiskgroup { -a | -Ffailgroup |-Ddisk} [-w]
Table 12-43 lists the syntax options for the online command.
Table 12-43 Options for the online command
| Option | Description |
|---|---|
-a | Online all offline disks in the disk group. |
-G diskgroup | Disk group name. |
-F failgroup | Failure group name. |
-D disk | Disk name. |
-w | Wait option. Causes ASMCMD to wait for the disk group to be rebalanced before returning control to the user. The default is not waiting. |
When a failure group is specified, this implies all the disks that belong to it should be onlined.
Example
The following are examples of the online command. The first example onlines all disks in the failgroup1 failure group of the data disk group with the wait option enabled. The second example onlines the data_0001 disk in the data disk group.
Example 12-47 Using the ASMCMD online command
ASMCMD [+] > online -G data -F failgroup1 -w

ASMCMD [+] > online -G data -D data_0001
Purpose
Rebalances a disk group.
Syntax and Descriptionrebal [--powerpower] [-w] diskgroup
Table 12-44 lists the syntax options for the rebal command.
Table 12-44 Options for the rebal command
| Option | Description |
|---|---|
diskgroup | Disk group name. |
--power power | Power setting. |
-w | Wait option. Causes ASMCMD to wait for the disk group to be rebalanced before returning control to the user. The default is not waiting. |
The power level can be set to the same values as the ASM_POWER_LIMIT initialization parameter. A value of 0 disables rebalancing. If the rebalance power is not specified, the value defaults to the setting of the ASM_POWER_LIMIT initialization parameter. For information about the power level, see “ASM_POWER_LIMIT” and “Tuning Rebalance Operations”.
You can determine if a rebalance operation is occurring with the ASMCMD lsop command. See “lsop”. For more information about rebalancing a disk group, see “Manually Rebalancing Disk Groups”.
Example
The following is an example of the rebal command that rebalances the fra disk group with a power level set to 4.
Example 12-48 Using the ASMCMD rebal command
ASMCMD [+] > rebal --power 4 fra

ASMCMD [+] > lsop
Group_Name  Dsk_Num  State  Power
FRA         REBAL    RUN    4
Purpose
Marks a range of blocks as unusable on the disk and relocates any data allocated in that range.
Syntax and Description
remap diskgroup disk block_range
Table 12-45 lists the syntax options for the remap command.
Table 12-45 Options for the remap command
| Option | Description |
|---|---|
diskgroup | Disk group name in which a disk must have data relocated. |
disk | Name of the disk that must have data relocated. The name must match the NAME column in the V$ASM_DISK view. |
block_range | Range of physical blocks to relocate in the format start_range_number-end_range_number. |
The remap command only relocates blocks. It does not correct or repair blocks that contain corrupted contents. The command uses a physical block size based on the SECTOR_SIZE disk group attribute.
Examples
The first example remaps blocks 5000 through 5999 for disk DATA_0001 in disk group DATA. The second example remaps blocks 6230 through 6339 for disk FRA_0002 in disk group FRA
Example 12-49 Using the ASMCMD remap command
ASMCMD [+] > remap DATA DATA_0001 5000-5999

ASMCMD [+] > remap FRA FRA_0002 6230-6339
Purpose
Sets the attributes for an Oracle ASM disk group.
Syntax and Descriptionsetattr-Gdiskgroupattribute_nameattribute_value
Table 12-46 lists the syntax options for the setattr command.
Table 12-46 Options for the setattr command
| Option | Description |
|---|---|
-G diskgroup | Disk group name. |
attribute_name | Name of the attribute. |
attribute_value | Value of the attribute. |
The COMPATIBLE.ASM attribute must be advanced before advancing other disk group compatibility attributes and its value must be greater than or equal to the value of other disk group compatibility attributes.
For information about disk group attributes, see “Disk Group Attributes”.
Example
The following are examples of the setattr command. The first example sets the disk group attribute COMPATIBLE.ASM to 11.2 for the data disk group. The second example sets the disk group attribute COMPATIBLE.RDBMS to 11.2 for the data disk group.
Example 12-50 Using the ASMCMD setattr command
ASMCMD [+] > setattr -G data compatible.asm 11.2.0.0.0

ASMCMD [+] > setattr -G data compatible.rdbms 11.2.0.0.0
Purpose
Dismounts a disk group.
Syntax and Descriptionumount { -a | [-f] diskgroup }
Table 12-47 lists the syntax options for the umount command.
Table 12-47 Options for the umount command
| Option | Description |
|---|---|
diskgroup | Name of the disk group. |
-a | Dismounts all mounted disk groups. These disk groups are listed in the output of the V$ASM_DISKGROUP view. |
-f | Forces the dismount operation. |
Example
The following are examples of the umount command. The first example dismounts all disk groups mounted on the Oracle ASM instance. The second example forces the dismount of the data disk group.
Example 12-51 Using the ASMCMD umount command
ASMCMD [+] > umount -a

ASMCMD [+] > umount -f data
You must perform these steps in the order listed to stop Oracle RAC:
You must perform these steps in the order listed to start Oracle RAC:
1. crsctl start crs
2. crsctl start res ora.crsd -init
3. srvctl start nodeapps [-node node_name] [-gsdonly] [-adminhelper] [-verbose]
4. srvctl start asm [-proxy] [-node node_name [-startoption start_options]]
5. srvctl start database -db db_unique_name [-eval(12c only)]] [-startoption start_options] [-node node_name]
6. srvctl start listener [-node node_name] [-listener listener_name] (start all listener services)
7. emctl start dbconsole (11c only)
To start resources of your HA environment if that are still down(e.g. ora.ons, Listener):
crsctl start resource -all
Starting with Oracle 12c, the log and trace files of the clusterware files are stored in the Automatic Diagnostic Repository (ADR) under the ADR_HOME location $ADR_BASE/diag/crs/`hostname`/crs.
$ adrci
adrci> show homes
Clusterware Resource Status Check : crsctl status resource -t (or shorter: crsctl stat res -t)
crsctl status resource -t (or shorter: crsctl stat res -t)
Find offline resources: crs_stat -t | grep -i offline
crsctl check cluster
CRS-4537: Cluster Ready Services is online
CRS-4529: Cluster Synchronization Services is online
CRS-4533: Event Manager is online
To know the cluster name: olsnodes -c
crsctl check crs
CRS-4638: Oracle High Availability Services is online (has)
CRS-4537: Cluster Ready Services is online (crs)
CRS-4529: Cluster Synchronization Services is online (css)
CRS-4533: Event Manager is online
crsctl stop has
This command will also abort the database and CRS. Local Listeners will stop and VIP listeners will migrate elsewhere.
crsctl start has
This command will start all the CRS components, listeners and the database.
crsctl stop cluster -all
crsctl start cluster -all
crsctl stop crs
crsctl start crs
C:\Windows\system32>oifcfg ge34f
Heartbeat 194.56.67.0 global cluster_interconnect,asm
Production 10.356.3.0 global public
srvctl status nodeapps [-n my-node]
For each VIP address: network enabled/disabled, running on node host1 or not running.
Nodeapps are standard set of oracle application services which are started automatically for RAC.
Node apps Include:
1) VIP
2) Oracle Net listeners
3) Global Service Daemon
4) Oracle Notification Service (ONS).
Nodeapp Services run on each node of the cluster. They switch over to other nodes through VIP during a failover.
The SCAN makes it possible to add or remove nodes from the cluster without needing to reconfigure clients.
Using CLUVFY to Confirm DNS is Correctly Associating the SCAN addresses.
cluvfy comp scan
Verifying Single Client Access Name (SCAN) …PASSED
Verification of SCAN was successful.
CVU operation performed: SCAN
Date: Oct 19, 2017 1:17:59 PM
CVU home: C:\…\grid_home\bin\..\
User: .\VFENOLL
srvctl config scan
SCAN name: MY-CLUSTER-SCAN, Network: 1
Subnet IPv4: 10.104.2.0/255.255.255.0/Production, static
Subnet IPv6:
SCAN 1 IPv4 VIP: 10.404.2.677
SCAN VIP is enabled.
SCAN VIP is individually enabled on nodes:
SCAN VIP is individually disabled on nodes:
SCAN 2 IPv4 VIP: 10.404.2.618
SCAN VIP is enabled.
SCAN VIP is individually enabled on nodes:
SCAN VIP is individually disabled on nodes:
SCAN 3 IPv4 VIP: 10.404.2.619
SCAN VIP is enabled.
SCAN VIP is individually enabled on nodes:
SCAN VIP is individually disabled on nodes:
srvctl status scan
SCAN VIP scan1 is enabled
SCAN VIP scan1 is running on node my-node1
SCAN VIP scan2 is enabled
SCAN VIP scan2 is running on node my-node2
SCAN VIP scan3 is enabled
SCAN VIP scan3 is running on node my-node1
If you want to add or modify a scan VIP: srvctl add | modify scan -n my-scan
To delete it: srvctl remove scan
srvctl status scan_listener
SCAN Listener LISTENER_SCAN1 is enabled
SCAN listener LISTENER_SCAN1 is running on node my-node1
SCAN Listener LISTENER_SCAN2 is enabled
SCAN listener LISTENER_SCAN2 is running on node my-node2
SCAN Listener LISTENER_SCAN3 is enabled
SCAN listener LISTENER_SCAN3 is running on node my-node1
If you want to add or remove a scan_listener: srvctl add | remove scan_listener
To change the port: srvctl modify scan_listener -p
cluvfy comp ocr -n all -verbose
Verifying OCR Integrity …PASSED
Verification of OCR integrity was successful.
CVU operation performed: OCR integrity
Date: Oct 11, 2017 4:56:01 PM
CVU home: C:\…grid_home\bin\..\
User: \VFENOLL
Oracle takes physical backup of OCR automatically every 3 hours. Default location is CRS_home/cdata/my_cluster_name/OCRBackup.
The ocrconfig tool is used to make daily copies of the automatically generated backup files.
Show backups:
ocrconfig -showbackup
Change default location of physical OCR copies:
ocrconfig -backuploc
After that, you have to copy these files on tape or in another backup location (cp -p -R CRS_home/cdata/my_cluster_name /u03/backups )
To do a manual backup:
ocrconfig -export /u03/backups/exports/OCR_exportBackup.dmp
Pre-requisite: All RAC components shutdow
Recover OCR from automatic physical backups:
crconfig -restore CRS_home/cdata/my_cluster_name/OCRBackup/backup00.ocr
Recover OCR from export backup:
ocrconfig -import /u03/backups/exports/OCR_exportBackup.dmp
In older versions of Oracle Clusterware you have to backup voting disks with the dd command.
Starting with Oracle Clusterware 11g Release 2 you no longer need to backup them. Voting disks are automatically backed up as a part of the OCR.
This name is useful as it is used in RAC commands with -d parameter.
With SQL*Plus:
connect / as sysdba
show parameter db_unique_name
With crsctl:
crsctl status resource -t | grep db
srvctl config database -d my-db-name
Database unique name: my-db-name
Database name: my-db-name
Oracle home: D:\oracle\db\product\12.2.0\dbhome_1
Oracle user: nt authority\system
Spfile: +DATA/my-db-name/PARAMETERFILE/spfile.272.9460543263
Password file: +DATA/my-db-name/PASSWORD/pwdmy-db-name.256.998734039
Domain:
Start options: open
Stop options: immediate
Database role: PRIMARY
Management policy: AUTOMATIC
Server pools:
Disk Groups: DATA,FRA
Mount point paths:
Services: my-db-name1,my-db-name2,srv1,srv2, srv3
Type: RAC
Start concurrency:
Stop concurrency:
Database instances: my-db-name1,my-db-name2
Configured nodes: node1,node2
CSS critical: no
CPU count: 0
Memory target: 0
Maximum memory: 0
Default network number for database services:
Database is administrator managed
srvctl status database -d my-db-name
Instance my-db-name1 is running on node node1
Instance my-db-name2 is not running on node node2
To list just active nodes: olsnodes -s –t
srvctl stop database -d my-db-name -o immediate
srvctl start database -d my-db-name
srvctl start instance -d my-db-name -i my-db-name1
srvctl stop instance -d my-db-name -i my-db-name1
Use -force if the instance to stop is not on the local server
On the current node [or on all the nodes]:
ALTER PLUGGABLE DATABASE my-PDB-name CLOSE IMMEDIATE [Instances=all];
This will stop the associated service too.
Manually stopping the associated service will not close the PDB. You have to use this SQL command.
On the current node [or on all the nodes]:
ALTER PLUGGABLE DATABASE my-PDB-name OPEN [Instances=all;]
You can also start the PDB with the associated service
This will NOT start the service(s) associated with this PDB.
srvctl stop listener -l LISTENER_NAME
srvctl start listener -l LISTENER_NAME
We can run following queries to check all are fine with Standby db.
@Primaryset lines 500
column destination format a35 wrap
column process format a7
column archiver format a8
column ID format 99
select dest_id “ID”,destination,status,target,archiver,schedule,process,mountid from v$archive_dest;
Output (Status should return valid for standby destination)
ID DESTINATION STATUS TARGET ARCHIVER SCHEDULE PROCESS MOUNTID
1 /podaai/arch/PODAAI1/ VALID PRIMARY ARCH ACTIVE ARCH 0
2 podaai1_rmdc VALID STANDBY ARCH ACTIVE ARCH 0
3 INACTIVE PRIMARY ARCH INACTIVE ARCH 0
4 INACTIVE PRIMARY ARCH INACTIVE ARCH 0
5 INACTIVE PRIMARY ARCH INACTIVE ARCH 0
6 INACTIVE PRIMARY ARCH INACTIVE ARCH 0
7 INACTIVE PRIMARY ARCH INACTIVE ARCH 0
8 INACTIVE PRIMARY ARCH INACTIVE ARCH 0
9 INACTIVE PRIMARY ARCH INACTIVE ARCH 0
10 INACTIVE PRIMARY ARCH INACTIVE ARCH 0
column error format a55 tru
select dest_id,status,error from v$archive_dest;
Output (Should not return any error messages)
DEST_ID STATUS ERROR
     1 VALID
     2 VALID
     3 INACTIVE
     4 INACTIVE
     5 INACTIVE
     6 INACTIVE
     7 INACTIVE
     8 INACTIVE
     9 INACTIVE
    10 INACTIVE
column message format a80
select message, timestamp from v$dataguard_status where severity in (‘Error’,’Fatal’) order by timestamp;
Output (Should not return any rows)
SCP SYNTAX
scp PGEORI_2_23362*.arc rmohsgeor36.oracleoutsourcing.com:/pgeori/arch/PGEORI1
$ scp PCFITI_1_57371_604994162.arc rmohscfit03.oracleoutsourcing.com:/pcfiti/arch/
PCFITI_1_57371_604994162.arc
@Standbyselect process,status,client_process,sequence#,block#,active_agents,known_agents from v$managed_standby;
Output (Should show MRP process up and running)
PROCESS STATUS CLIENT_P SEQUENCE# BLOCK# ACTIVE_AGENTS KNOWN_AGENTS
ARCH CONNECTED ARCH 0 0 0 0
ARCH CONNECTED ARCH 0 0 0 0
ARCH CONNECTED ARCH 0 0 0 0
ARCH CONNECTED ARCH 0 0 0 0
RFS RECEIVING UNKNOWN 13491 36819 0 0
RFS RECEIVING UNKNOWN 13364 1810 0 0
RFS RECEIVING UNKNOWN 13493 38735 0 0
RFS RECEIVING UNKNOWN 13363 156 0 0
RFS ATTACHED UNKNOWN 13494 36989 0 0
RFS RECEIVING UNKNOWN 0 0 0 0
RFS RECEIVING UNKNOWN 13362 327 0 0
PROCESS STATUS CLIENT_P SEQUENCE# BLOCK# ACTIVE_AGENTS KNOWN_AGENTS
RFS ATTACHED UNKNOWN 13365 165 0 0
RFS RECEIVING UNKNOWN 13492 36686 0 0
MRP0 WAIT_FOR_LOG N/A 13493 0 0 0
column message format a80
select message, timestamp from v$dataguard_status where severity in (‘Error’,’Fatal’) order by timestamp;
Output (Should not return any rows)
Note: If we gets results as shown above, we can close the standby alerts as TFALSE.
Pls correct/ add comments if required.
To determine if there is an archive gap on your physical standby database, query
the as shown in the following example:
break on report
compute sum of GAP on report
select to_char(sysdate,’DD.MM.RR HH24:MI:SS’) time, a.thread#, (select
max(sequence#) from v$archived_log where archived’YES’ and thread#a.thread#)
archived, max(a.sequence#) applied, (select max(sequence#) from v$archived_log
where archived’YES’ and thread#a.thread#)-max(a.sequence#) gap from
v$archived_log a where a.applied’YES’ group by a.thread#;
To verify the log application status.
SELECT THREAD#, MAX(SEQUENCE#) AS “LAST_GENERATED_LOG” FROM V$LOG_HISTORY GROUP BY THREAD#;
SELECT THREAD#, MAX(SEQUENCE#) AS “LAST_APPLIED_LOG” FROM V$LOG_HISTORY GROUP BY THREAD#;
To see the max seq applied.
select THREAD#,max(SEQUENCE#) from v$archived_log where APPLIED’YES’ group by THREAD#;
To stop the MRP.
alter database recover managed standby database cancel;
To start the MRP.
recover managed standby database disconnect from session;
To recover standby manually.
SQL> recover automatic standby database;
SQL> recover managed standby database parallel
a. no. of cpu…
b. no. of thread possible on each cpu…
total threads a*b -1
To enable the in one commmand.
SQL> ALTER SYSTEM SET log_archive_dest_state_2enable scopeboth SID’*’ ;
To start the standby and put in MRP
SQL> startup nomount;
SQL> alter database mount standby database;
recover managed standby database disconnect from session ;
To find the missing logs @ standby
./autofs/cmd_ctr/database/missing_seq.sh
missing_seq.sh Parameter missing: missing_seq.sh low_seq high_seq thread#_if_rac
In case of Non Rac: missing_seq.sh 200 220 No need to give thread#
for Non Rac: missing_seq.sh 200 220 3 Here 3 is the thread#
set pagesize 10000
SELECT A., Round(A.Count#B.AVG#/1024/1024) Daily_Avg_Mb
FROM
(
SELECT thread#,
To_Char(First_Time,’YYYY-MM-DD’) DAY,
Count(1) Count#,
Min(RECID) Min#,
Max(RECID) Max#
FROM
gv$log_history
GROUP BY
thread#, To_Char(First_Time,’YYYY-MM-DD’)
ORDER
BY 2 DESC
) A,
(
SELECT Thread#,
Avg(BYTES) AVG#,
Count(1) Count#,
Max(BYTES) Max_Bytes,
Min(BYTES) Min_Bytes
FROM
gv$log group by thread#
) B where a.thread#b.thread#;
THREAD# DAY COUNT# MIN# MAX# DAILY_AVG_MB
     1 2010-03-24        113     133452     133564        14238
     1 2010-03-23        174     133278     133451        21924
     1 2010-03-22        182     133096     133277        22932
     1 2010-03-21        112     132984     133095        14112
     1 2010-03-20        145     132839     132983        18270
     1 2010-03-19        176     132663     132838        22176
     1 2010-03-18        200     132463     132662        25200
     1 2010-03-17        154     132309     132462        19404
     1 2010-03-16        164     132145     132308        20664
1 2010-03-15 40 132105 132144 5040to shutdown (in all nodes)
$ srvctl stop database -d <db_unique_name>
$ crsctl stop cluster -all
$ crsctl stop crs -all
to startup (in all nodes)
$ crsctl start crs -all
$ crsctl start cluster -all
$ srvctl start database -d <db_unique_name>
This post will deal the situation where you have big size of dump of anything and you need to split that into smaller chunks than need to send over ftp/mail etc. After that need to regenerate the same it was before splitting.
Situation: I have a expdp dump of 35 GB, I need to send it via ftp mail which can accept maximum 1 GB file.
Solution:
NOTE: With below command you can expdp without sysdba pwd.
expdp \"/ as sysdba\" FLASHBACK_TIME=\"TO_TIMESTAMP\(TO_CHAR\(SYSDATE,\'YYYY-MM-DD HH24:MI:SS\'\),\'YYYY-MM-DD HH24:MI:SS\'\)\" full=y dumpfile=full_db.dmp logfile=full_db.log DIRECTORY=DATAPUMP_DIR compression=METADATA_ONLY version=latest PARALLEL=4
NOTE: Another way to expdp without password is as under.
expdp \'/ as sysdba\' directory=DATAPUMP_DIR full=y ...
1. Zip the existing dump.
gzip full_db.dmp
2. Split the .gz file into 1 GB files.
split -b 1024m “full_db.dmp.gz” “full_db.dmp.gz_01”
3. Send it using appropriate method like ftp, attachement etc.
ftp/mail etc.
4. Merge splitted files again
Linux: cat full_db.dmp.gz_01a* > full_db.dmp.gz
Windows: copy /b file1 + file2 + file3 + file4 filetogether
5. Unzip the file and now you are ready to do everything on this file, as it was in step 1.
Now unzip the compressed dump and it is ready to use.
gunzip full_db.dmp.gz
It provide the information about below ones:
System model.
Machine serial number.
Processor type, number of processors and clock speed of processors.
Network information.
File system information.
Paging space information.
Devices information.
Total memory size.
To Gather General Machine Information
Using the command prtconf alone provides the whole information of machine.
The sample is given below. Some actual values have been replaced with other values for the sake of security.
ask-sanjay10: $ prtconf
To know what is the LPAR partition number and partition name use -L.
ask-sanjay10: $ prtconf -L
If its not LPAR, then “-1 NULL” will be returned.
To know the physical memory size of the machine use -m flag.
ask-sanjay10: $ prtconf -m
To know the Vital Product Data of all physical devices internal or attached to the machine, use -v option.
ask-sanjay10: $prtconf -v
Almost all of the information gathered by above commands is sn above in the output of prtconf command.
To Get The Processor Clock Speed
For this issue the command with -s parameter.
ask-sanjay10: $ prtconf -s
To Get CPU Type
To know if the cpu type is 32 bit or 64 bit, issue the command with -c parameter.
ask-sanjay10: $ prtconf -c
To Know The Type of Kenel bits
ask-sanjay10: $ prtconf -k